CustomiZer
The all-in-one custom content plugin for Paper servers. No dependencies to fight. No format to memorize. Just configure and play.
What Makes CustomiZer Different?
Most custom-content plugins make you manage resource packs by hand — manually zipping files, uploading them somewhere, and hoping nothing breaks. CustomiZer builds the pack for you, serves it from a built-in HTTP server, and pushes it to every player who joins. You never touch a ZIP file.
Configuration is done in plain YAML files that are designed to be readable by humans, not just developers. If you've used ItemsAdder before, you already know the pack format. If you haven't, the guides below will walk you through everything step by step.
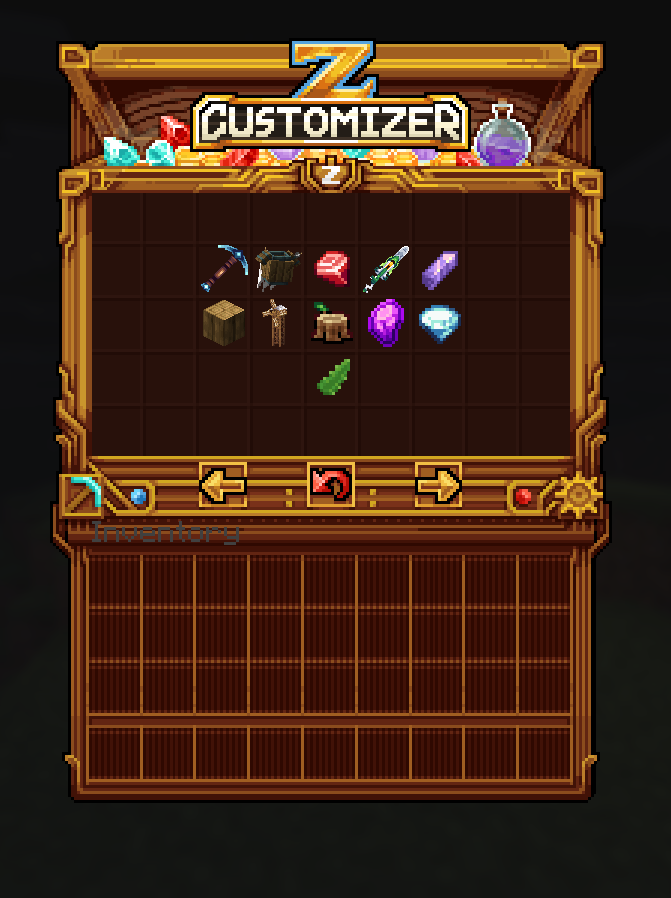
The /zitems main menu — a fully custom GUI that lets players browse every pack, weapon, tool, and item on your server. Admins can give items with a single click.
CustomiZer vs ItemsAdder & Nexo
If you've shopped around for custom-content plugins you've probably looked at ItemsAdder and Nexo (formerly Oraxen — Nexo is simply a paid continuation of the same project under a new name). Here's how CustomiZer stacks up:
| Feature | CustomiZer | ItemsAdder | Nexo (ex-Oraxen) |
|---|---|---|---|
| Built-in resource pack server | ✓ Built-in HTTP server (requires URL/port config) | Needs manual upload or external hosting | Needs manual upload or external hosting |
| Kill-based weapon levelling | ✓ Fully configurable rarity chain | ✗ | ✗ |
| Harvester hoes with XP levelling | ✓ Per-level abilities | ✗ | ✗ |
| Custom pickaxes with mining progression | ✓ Area mining, level-gated effects | ✗ | ✗ |
| Armor sets with set bonuses | ✓ Potion effects + commands | Partial | Partial |
| Gem socket system | ✓ Built-in | ✗ (third-party) | ✗ (third-party) |
| Mastery / Missions / Prestige tracks | ✓ All three built-in | ✗ | ✗ |
| Ore generators | ✓ Per world, per biome, per height | ✗ | ✗ |
| ESC menu customization | ✓ + Lunar & Feather Client support | ✗ | ✗ |
| Custom crafting tables (GUI) | ✓ Built-in | ✗ | Partial |
| ItemsAdder pack format compatible | ✓ Drop-in compatible | — | ✗ |
| Bedrock / Geyser conversion | ✓ Full auto-converter built-in (items, blocks, 3D models, GUIs, furniture, animations) | Partial — manual Geyser mappings, no auto-converter | Partial — basic Geyser support, manual setup required |
| Item-bound backpacks | ✓ Trade the item, transfer the contents | Partial (third-party) | ✗ |
| Pricing | Paid (~25€) | Paid | Paid |
The Big Picture
There are two separate systems you'll be working with, and understanding the difference is the key to mastering this plugin:
Think of it this way: packs/ is about how things look. CustomiZe! is about how things behave. For many features you need both — a texture in packs/ and a behavior definition in CustomiZe!.
Everything This Plugin Can Do
Installation
From zero to a running server with CustomiZer in five minutes.
Requirements
| Requirement | Details |
|---|---|
| Server software | Paper 1.21+ (Spigot is NOT supported) |
| Java | Java 21 or newer |
| PacketEvents | Required — list it under libraries: in plugin.yml or install separately |
| Vault | Optional — needed for money rewards and repair costs |
Step-by-Step Setup
Drop the JAR into plugins/
Copy CustomiZer.jar into your server's plugins/ folder. Start the server once. CustomiZer will generate all its config files and folder structure automatically. Then stop the server.
Set your public IP in config.yml
Open plugins/CustomiZer/config.yml and find the resourcepack section. Set url to your server's public IP address or domain name. This is the address players' Minecraft clients will download the pack from.
resourcepack:
  enabled: true
  url: "http://123.456.789.0"   # Your public IP
  port: 7270                     # Port for the pack HTTP server (open this in your firewall!)
The port 7270 (or whatever you set) must be open in your server's firewall. It's a separate port from your Minecraft server port.
Add your packs (optional at first)
If you have resource packs to add, put them in plugins/CustomiZer/packs/. You can skip this for now and come back to it — the plugin works fine with just the built-in content.
Start the server
Start the server. In the console you'll see messages like [ResourcePack] HTTP server started on port 7270 and [ResourcePack] Pack ready. When a player joins, they'll automatically receive a prompt to download the resource pack.
Make changes and reload
Any time you edit config files, run /z reload in-game or from console. This reloads all configs and rebuilds the resource pack in the background — no restart needed.
Folder Structure After First Start
packs/ ← Put resource packs here
CustomiZe!/ ← Configure gameplay mechanics here
__global__/ ← Server-wide configs (always loaded)
my_pack/ ← Per-pack config overrides
includes/ ← Highest-priority pack overrides
lang/ ← en.yml, fr.yml (plugin messages)
gui/ ← GUI appearance config
main_menu.yml ← /z gui category browser (title, background, border, Browse All Items button)
items_shop.yml ← /zitems nav buttons
all_items.yml ← "Browse All Items" paginated GUI
db/ ← Database files
backpacks.db ← Backpack inventory storage (SQLite)
custom_crafting_recipes.db
import_export/ ← All import/export folders
item_input/ ← Drop items here for import
geyser_output/ ← Bedrock pack output (/zpack geyser)
config.yml ← Main configuration
settings.yml ← Debug, integrations, ESC menu toggles
output.zip ← Generated pack (auto-created, don't edit)
config.yml
The main configuration file — resource pack server, language, messages, economy boosts.
plugins/CustomiZer/config.yml. Changes take effect after /z reload.Resource Pack Settings
This is the most important section. It controls how the pack is built and served to players.
resourcepack:
  enabled: true

  # The public URL players will download the pack from.
  # Must be reachable from the internet. Use your server's public IP or domain.
  url: "http://YOUR.PUBLIC.IP"

  # The HTTP port the plugin listens on. Open this port in your firewall.
  port: 7270

  # Resource pack format version. 46 = Minecraft 1.21.x
  format: 46

  # Optional: merge external resource pack ZIPs into the generated pack.
  # Paths are relative to your plugins/ folder.
  merge-packs:
    - "ModelEngine/resource pack.zip"
Language & Messages
language: en   # "en" or "fr"

# Whether to show a hotbar message when players earn rewards
hotbar_message_enabled: true
hotbar_message_format: "&a{job} XP: &b{jobsxp}  &aMoney: &b{money}"

# Whether to show a bossbar message
bossbar_message_enabled: true
bossbar_message_format: "{job} | XP: {jobsxp} | Money: {money}"
bossbar_color: BLUE     # BLUE, PURPLE, YELLOW, GREEN, WHITE
bossbar_style: SOLID    # SOLID, SEGMENTED_6, SEGMENTED_10, SEGMENTED_12, SEGMENTED_20
WorldGuard Region Boosts
If WorldGuard is installed and enabled in settings.yml, you can multiply or divide rewards in specific regions:
# Players in "vip_mine" earn 2x XP and money
Multiplier:
  vip_mine: 2.0
  elite_zone: 3.0

# Players in "noob_area" earn half rewards
Diviser:
  noob_area: 2.0

# Time-based global boost (all players)
GlobalBoost:
  start: "18:00"
  end: "20:00"
  multiplier: 1.5
settings.yml
Debug mode, optional integration toggles, and client-specific pack settings.
# Set to true for detailed debug logs in console. Leave false on production.
debug: false

dependencies:
  # Enable if you have ItemsAdder AND want its custom blocks to give
  # CustomiZer rewards (Jobs XP, money, etc.)
  itemsadder_support: false

  # Enable if you have WorldGuard AND want region-based multipliers.
  worldguard_integration_support: false

  # Enable if you have Jobs Reborn AND want custom blocks to give Jobs XP.
  jobs_support: false

esc_menu:
  # When true: Feather Client players get the pack WITHOUT ESC menu art.
  # Feather Client is auto-detected. No setup needed.
  ignore_feather_client: false

  # When true: Lunar Client players get the pack WITHOUT ESC menu art.
  # Requires Apollo-Bukkit plugin.
ignore_lunar_client: false/z reload — no server restart needed.How the Resource Pack Works
Understanding what happens automatically so you know what you DON'T have to do.
The Automatic Process
When the server starts (or when you run /z reload), CustomiZer does all of this automatically:
Starts an HTTP server
A lightweight web server starts on the port you configured (default 7270). This server will serve your resource pack file to players when they join.
Scans all your packs
Every folder in plugins/CustomiZer/packs/ is scanned. All YAML files inside their configs/ subfolders are read and all items, blocks, fonts, and ESC menu overrides are registered.
Generates model and blockstate files
For every item defined with generate: true, CustomiZer creates the JSON model file automatically from your texture. For custom blocks, it creates the note-block blockstate overrides. You never write JSON manually.
Builds and serves the pack
Everything is bundled into a ZIP file and kept in memory. The pack is served from your.ip:7270/<hash>.zip. The hash changes every time the pack changes, so players always get the latest version.
Pushes the pack to joining players
2 seconds after a player joins, they receive a prompt asking them to accept the resource pack. Once accepted, all your custom textures, blocks, and GUI art is visible to them.
Content Priority
When two sources try to define the same file, this order determines which wins:
| Priority | Source | When to use |
|---|---|---|
| 1st (highest) | plugins/CustomiZer/includes/ | Put your manual overrides here. Always wins. |
| 2nd | Auto-generated files (models, blockstates, fonts) | Created automatically from your YAML configs. |
| 3rd | merge-packs in config.yml | External ZIPs like ModelEngine output. |
| 4th (lowest) | packs/ folder assets | Your pack textures and models. |
Creating a Pack
A beginner-friendly walkthrough for adding your first custom pack.
What Is a "Pack"?
A pack is a folder inside plugins/CustomiZer/packs/ that contains two things:
- An
assets/folder with your texture and model files (just like a standard Minecraft resource pack) - A
configs/folder with YAML files that tell CustomiZer what items and blocks exist in this pack
Step-by-Step: Your First Pack
Create the folder structure
Create this structure inside plugins/CustomiZer/packs/:
assets/
my_first_pack/ ← must match your namespace
textures/
models/
configs/
items.yml
Add your texture
Put a PNG file in assets/my_first_pack/textures/items/. For example: ruby.png. It should be a 16×16 (or 32×32) pixel image.
Create items.yml
Open configs/items.yml and define your item:
info:
  namespace: my_first_pack   # Must match your assets folder name

items:
  ruby:
    display_name: "Ruby"
    resource:
      generate: true          # Auto-generate the model from the texture
      material: PAPER         # Vanilla item used as the base
      model_id: 200350        # Unique number — must not clash with other packs
      textures:
- items/ruby.png # Relative to assets/my_first_pack/textures/Register it in /zitems GUI (optional)
Create items/my_first_pack/gui.yml to make functional items show up in /zitems. Optionally also create packs/my_first_pack/gui.yml to show raw visuals in /z gui.
# items/my_first_pack/gui.yml  ← shown in /zitems (admin give tool)
name: "My First Pack"
slot: 20   # Position in the /zitems main menu

icon:
  pack: my_first_pack
  id: ruby
  lore:
    - "My custom items"

gui:
  title: "My First Pack"
  size: 6

items:
  - type: pack_item
    pack: my_first_pack
    id: ruby
For the /z gui display browser, create packs/my_first_pack/gui.yml with type: pack_item or type: raw entries (same format, different file).
Reload
Run /z reload. The resource pack rebuilds in the background. After a few seconds, reconnect or run /zpack push to send the new pack to online players.
You can now give the item with /z give ruby or find it in /zitems.
model_id (Custom Model Data) must be unique across ALL packs on your server. Keep a spreadsheet or use large number ranges per pack to avoid collisions. For example: pack A uses 200000–200999, pack B uses 201000–201999.Namespace Rules
- The namespace in
info.namespacemust be lowercase, no spaces, no special characters - It must match the folder name inside
assets/ - You reference items from this pack as
namespace:item_key— for examplemy_first_pack:ruby
Pack Items
Define custom items inside your pack. These are the visual layer — textures, models, and materials.
How items are split across two files
Like blocks, items live in two config files. The pack file controls appearance; the CustomiZe! file controls behaviour.
| File | Controls |
|---|---|
packs/your_pack/configs/items.yml | Texture, model, base material — what the item looks like |
CustomiZe!/your_pack/items.yml | Action on use, cooldown, number of uses, food properties, display name & lore shown in-game |
CustomiZe! entry. Items used only as block drops or pack drops work with just the packs/configs file. You only need the CustomiZe! side when the item should do something when a player uses it (command, heal, food, etc.).Simple Item with Auto-Generated Model
Use this when you have a flat PNG texture and want CustomiZer to automatically make a Minecraft item model:
info:
  namespace: my_pack

items:
  # The key "ruby" is how you reference this item everywhere else.
  # Format: namespace:key → "my_pack:ruby"
  ruby:
    display_name: "Ruby"   # Shown in-game (supports color codes)
    resource:
      generate: true        # true = auto-generate model from textures
      material: PAPER       # Vanilla material (PAPER is a common choice for flat items)
      model_id: 200350      # Custom Model Data (must be globally unique)
      textures:
        - items/ruby.png    # In assets/my_pack/textures/items/ruby.png
Item with a Hand-Crafted Model
Use this when you have a pre-made 3D model JSON (e.g. from Blockbench):
  dragon_sword:
    display_name: "Dragon Sword"
    resource:
      generate: false                        # false = use the model at model_path
      material: IRON_SWORD                   # Use a sword material for handheld animation
      model_path: weapons/dragon_sword       # In assets/my_pack/models/weapons/dragon_sword.json
Item with Permission
Only players with the specified permission can see or use this item:
  vip_gem:
    display_name: "VIP Gem"
    permission: myserver.vip.gem   # Optional permission node
    resource:
      generate: true
      material: PAPER
      model_id: 200351
      textures:
        - items/vip_gem.png
Item Field Reference
| Field | Required? | Description |
|---|---|---|
display_name | required | Name shown in-game. Use &a for green, &6 for gold, etc. |
permission | optional | Permission node needed to use/see this item. |
resource.generate | required | true = auto-generate flat model. false = use model_path. |
resource.material | required | Vanilla Minecraft material (PAPER, IRON_SWORD, etc.) |
resource.model_id | if generate=true | Custom Model Data integer. Must be globally unique. |
resource.textures | if generate=true | List of texture paths relative to assets/namespace/textures/ |
resource.model_path | if generate=false | Path to model JSON (without .json extension) |
behaviours.hat | optional | true = can be worn on head slot |
Pack Blocks
Custom blocks that can be placed in the world, using note-block states under the hood for real solid placement with custom textures.
How blocks are split across two files
Custom blocks use two config files that work together — one for visuals, one for gameplay. This is the same pattern used by every other pack content type.
| File | Controls |
|---|---|
packs/your_pack/configs/blocks.yml | Textures, placement type, break sounds and particles |
CustomiZe!/your_pack/blocks.yml | Display name, lore, which tools can break it, drops, hardness, blast resistance, Jobs XP, CaveBlock config |
packs/your_pack/configs/blocks.yml
This file registers the block in the resource pack — textures, placement type, and break sounds. The material is the base item players hold to place the block (use BRICK for most blocks). The model ID is assigned automatically from the texture.
# packs/my_pack/configs/blocks.yml

info:
  namespace: my_pack

items:
  silver_ore:
    display_name: "Silver Ore"
    material: BRICK               # Base item held in hand to place the block
    resource:
      generate: true
      textures:
        - blocks/silver_ore.png   # Path inside assets/my_pack/textures/

    specific_properties:
      block:
        placed_model:
          type: REAL_NOTE         # Uses the note-block trick for real solid placement
        sound:
          break:
            name: "BLOCK_STONE_BREAK"
            volume: 1
            pitch: 1

  deepslate_silver_ore:
    display_name: "Deepslate Silver Ore"
    material: BRICK
    resource:
      generate: true
      textures:
        - blocks/deepslate_silver_ore.png
    specific_properties:
      block:
        placed_model:
          type: REAL_NOTE
        sound:
          break:
            name: "BLOCK_DEEPSLATE_BREAK"
            volume: 1
            pitch: 1
CustomiZe!/your_pack/blocks.yml
This file links the pack block to its gameplay behaviour. The pack_id uses the format namespace:item_id and matches the entry in your packs/configs file. See the Custom Blocks (CustomiZe!) page for all available options.
# CustomiZe!/my_pack/blocks.yml

blocks:

  silver_ore:
    pack_id: "my_pack:silver_ore"      # namespace:item_id from packs/configs
    display_name: "&fSilver Ore"
    lore:
      - "&7A rare silver deposit."
    drop_self: true                    # Block drops itself when broken
    break_with:
      - HAND
      - WOODEN_PICKAXE
      - STONE_PICKAXE
      - IRON_PICKAXE
      - GOLDEN_PICKAXE
      - DIAMOND_PICKAXE
      - NETHERITE_PICKAXE
    drops:
      - type: plugin_item             # Drop a plugin custom item
        item: silver_ingot
        amount: 1
        chance: 100
      - type: vanilla                 # Drop a vanilla item
        item: IRON_NUGGET
        amount_min: 1
        amount_max: 3
        chance: 50
      - type: command                 # Run a console command on break
        command: "eco give %player% 5"
        chance: 25

  deepslate_silver_ore:
    pack_id: "my_pack:deepslate_silver_ore"
    display_name: "&8Deepslate Silver Ore"
    lore:
      - "&7A rare silver deposit in deepslate."
    drop_self: false
    break_with:
      - IRON_PICKAXE
      - DIAMOND_PICKAXE
      - NETHERITE_PICKAXE
    drops:
      - type: plugin_item
        item: silver_ingot
        amount_min: 1
        amount_max: 2
chance: 100CustomiZe! blocks.yml entry. See Custom Blocks for the full reference.Pack Tools
Retextured vanilla tools and weapons — custom appearance, with optional advanced mechanics in the CustomiZe! folder.
How tools are split across two files
Simple retextured tools only need the packs/configs file. If you want rarity progression, custom durability, level-up systems, or special effects — add the mechanics side in CustomiZe!.
| File | Controls |
|---|---|
packs/your_pack/configs/tools.yml | Texture per rarity or level, base material — what the tool looks like |
CustomiZe!/your_pack/swords.yml | Swords: rarity tiers, attack damage, lifesteal, elemental damage, on-hit effects |
CustomiZe!/your_pack/axes.yml | Axes: same structure as swords — rarity tiers, kills required, on-hit effects |
CustomiZe!/your_pack/pickaxes.yml | Pickaxes: levels, mining radius, custom durability, blocks required to level up |
CustomiZe!/your_pack/harvesterhoes.yml | Harvester hoes: auto-harvest radius, replant behavior |
Tools in packs/configs follow the same format as pack items — same material, generate, and textures fields:
info:
  namespace: my_pack

items:
  silver_sword:
    display_name: "Silver Sword"
    resource:
      generate: true
      material: IRON_SWORD    # Stats of an iron sword, custom texture
      model_id: 200500
      textures:
        - tools/silver_sword.png

  silver_pickaxe:
    display_name: "Silver Pickaxe"
    resource:
      generate: true
      material: IRON_PICKAXE  # Stats of an iron pickaxe, custom texture
      model_id: 200501
      textures:
        - tools/silver_pickaxe.png

  mythril_axe:
    display_name: "Mythril Axe"
    resource:
      generate: true
      material: DIAMOND_AXE   # Diamond stats
      model_id: 200502
      textures:
- tools/mythril_axe.pngGood material choices by tool type
| Tool type | Recommended material |
|---|---|
| Sword | WOODEN_SWORD, STONE_SWORD, IRON_SWORD, DIAMOND_SWORD |
| Pickaxe | WOODEN_PICKAXE, IRON_PICKAXE, DIAMOND_PICKAXE, NETHERITE_PICKAXE |
| Axe | WOODEN_AXE, IRON_AXE, DIAMOND_AXE |
| Shovel | IRON_SHOVEL, DIAMOND_SHOVEL |
| Hoe | IRON_HOE, DIAMOND_HOE |
| Generic item | PAPER (most common — no durability bar, flat texture) |
Font Images (Glyphs)
PNG images rendered as text characters — used for GUI backgrounds, rank badges, icons in lore, and ESC menu art.
What Is a Font Image?
Minecraft supports custom fonts where each character can be replaced with a PNG image. CustomiZer uses this to render images anywhere text is shown — including inventory titles, item lore, chat, scoreboards, and the ESC menu.
This is how the fancy GUI backgrounds, the rank icons in chat, and the ESC menu logos work. They're all just carefully positioned PNG images rendered as "characters".
Defining Font Images in a Pack
Create a font.yml (or any .yml file) in your pack's configs/ folder:
info:
  namespace: my_pack

font_images:
  my_icon:                           # Key used to display this image
    path: "font/my_icon.png"         # In assets/my_pack/textures/font/my_icon.png
    scale_ratio: 11                  # Size of the image in pixels (height)
    y_position: 9                    # Vertical offset from the text baseline
Using a Font Image in Text
Once defined, you display the image using the MiniMessage <font_image> tag:
title: "<font_image:my_pack:my_icon>"
# or in item lore:
lore:
  - "<font_image:my_pack:my_coin> 500 coins"
The image appears inline wherever text appears — in inventory titles, item names, lore lines, chat messages, etc.
Rank Badge Glyphs (gem_ranks example)
Font images can be permission-gated. When show_in_gui: true is set, players with the required permission see their rank badge displayed in the GUI:
info:
  namespace: gem_ranks

font_images:
  bronze_amethyst_i:
    permission: bronze_amethyst_i     # Player needs this permission to see this glyph
    show_in_gui: true                 # Show in the rank GUI
    path: "bronze_amethyst_i"         # assets/gem_ranks/textures/bronze_amethyst_i.png
    scale_ratio: 12
    y_position: 9.5

  gold_diamond_iii:
    permission: gold_diamond_iii
    show_in_gui: true
    path: "gold_diamond_iii"
    scale_ratio: 12
    y_position: 9.5
Give a player the permission gem_ranks.bronze_amethyst_i and they'll see that badge appear next to their name or in the rank GUI.
GUI Background Font Images
The GUI background (the image behind the inventory grid) is also a font image. It's rendered in the inventory title with special pixel-offset characters:
info:
  namespace: CustomiZerInternal

font_images:
  "1":
    path: custom/30main_gui/1    # The GUI background image
    scale_ratio: 255             # Large scale = full inventory background
    y_position: 46
    x_position: -6.5
Then in the GUI title:
title: "<white><shift:-8><font_image:CustomiZerInternal:1>"The <shift:-8> is a pixel offset that positions the background image correctly.
Tips for Font Images
- scale_ratio: The height of the image in game pixels. 11–12 is good for small icons. 255 is used for full-screen GUI backgrounds.
- y_position: Move the image up or down relative to the text line. Positive = up, negative = down.
- Always use PNG with transparency for icons and badges.
- Test your glyphs by giving yourself a paper item with the font tag in its name.
In-Game Glyph Commands
CustomiZer includes a full set of admin commands to browse, search, preview, and manage glyphs directly in-game. All of these require the cxp.admin permission.
/zpack fonts
Lists every registered font image across all packs. Shows the pack name, font ID, Unicode codepoint, and the exact tag you need to paste into gui.yml:
# Example output in chat:
# [CustomiZer] Registered font images (12):
#   gem_ranks:bronze_amethyst_i  U+E000  → gui.yml: <font_image:gem_ranks:bronze_amethyst_i>
#   my_pack:my_icon              U+E001  → gui.yml: <font_image:my_pack:my_icon>
/zpack font <packName> <fontId>
Previews a single glyph. Sends it to your action bar so you can see exactly how it looks in-game. Run this whenever you add a new font image and want to check its size and position.
/zpack glyph list [packName]
Lists all registered glyphs (with the Glyph API metadata). Add a pack name to filter to just that pack's glyphs:
# All glyphs:
/zpack glyph list

# Only glyphs from "gem_ranks":
/zpack glyph list gem_ranks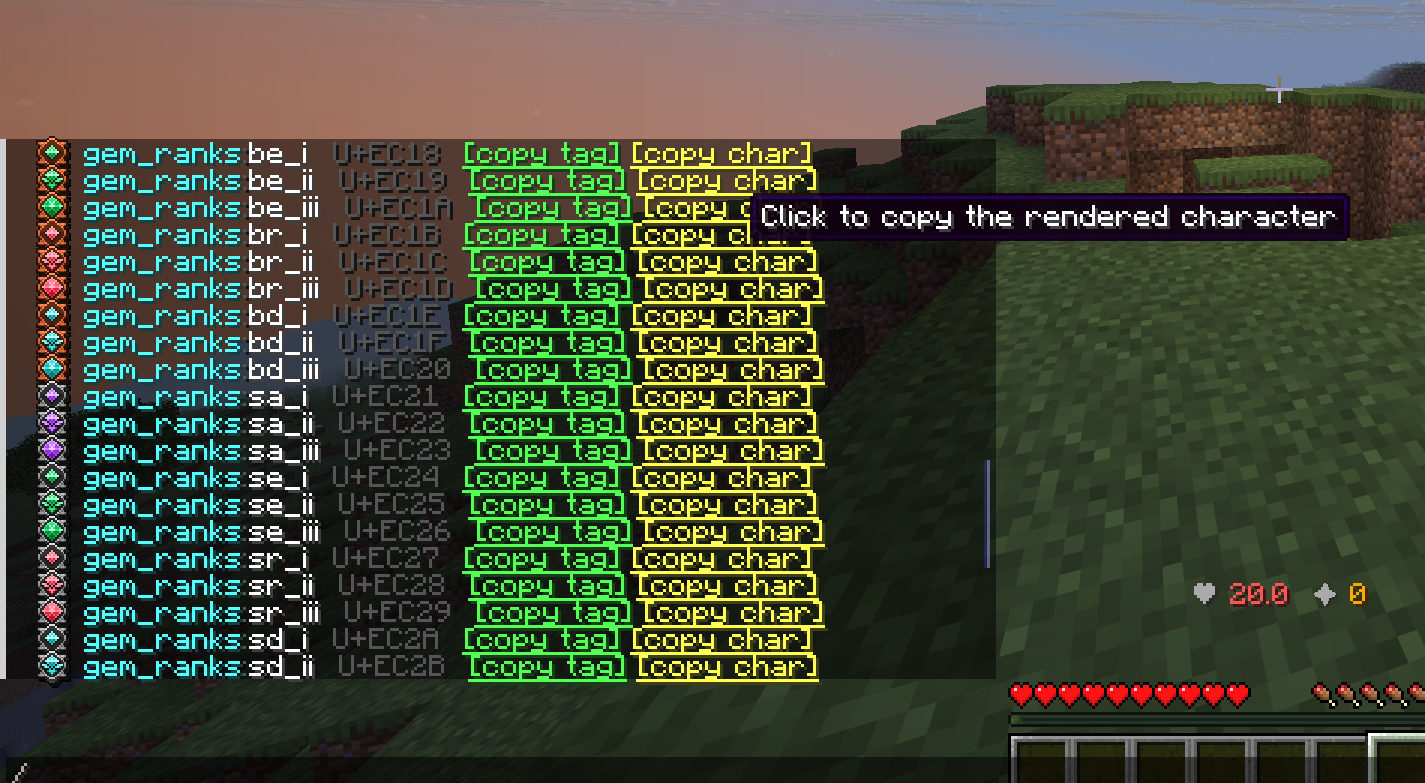
Each entry shows the pack name, font ID, Unicode codepoint, and two clickable links — [copy tag] copies the full <font_image:pack:id> tag ready to paste into any YAML, and [copy char] copies the rendered Unicode character itself. No need to open any YAML file — find the glyph you want in chat, click copy, paste it wherever you need it.
/zpack glyph <packName> <fontId>
Shows detailed info about one specific glyph — its codepoint, the Unicode character, and the YAML tag to use it.
/zpack glyph search <query>
Searches all registered glyphs by name. Useful when you have many font images and can't remember the exact ID:
/zpack glyph search bronze/zpack glyph export
Prints YAML snippets for every registered glyph. Useful if you want to lock codepoints so they don't change after a reload (copy the output into your pack configs).
/zpack glyph regenerate
Clears the entire glyph codepoint registry and reassigns all codepoints from scratch. Use this if codepoints have gotten misaligned after adding or removing glyphs. Warning: players must re-download the resource pack after running this.
PlaceholderAPI Integration
If PlaceholderAPI is installed, you can use glyphs as placeholders anywhere that supports PAPI:
| Placeholder | Returns |
|---|---|
%customizer_glyph_<pack>_<id>% | The rendered character (use in chat, lore, etc.) |
%customizer_glyph_unicode_<pack>_<id>% | Unicode escape (e.g. \uEC00) |
%customizer_glyph_hex_<pack>_<id>% | Hex codepoint (e.g. EC00) |
Example in a LuckPerms prefix: [%customizer_glyph_gem_ranks_gold_i%] — this renders the gold rank icon next to the player's name in chat.
ESC Menu Customization
Replace the vanilla pause menu text (like "Game Menu" and "Disconnect") with custom PNG images.
How It Works
Minecraft's ESC menu buttons show text from language files — for example, the title reads whatever the translation of menu.game says. CustomiZer injects custom font characters into those translation strings, replacing the text with your PNG image characters.
The result: players open their ESC menu and instead of "Game Menu" they see your server's logo image.
Setting It Up
Create a YAML config file in your pack's configs/ folder:
info:
  namespace: my_esc_pack

minecraft_lang_overwrite:
  esc_menu_texts:
    entries:
      # Replace the "Game Menu" title with your logo image
      "menu.game": ":top_logo_1::offset_-1:"

      # Replace the "Disconnect" button text with a custom banner image
      "menu.disconnect": ":offset_-10::offset_-256::bottom_banner::offset_-256:"

    # Apply to all language files (ALL), or specific ones: [en_us, fr_fr]
    languages:
      - ALL

    # For Lunar Client players (requires Apollo-Bukkit):
    # Set this to the resource location of the same logo image
    apollo_icon: "my_esc_pack:textures/top_logo_1.png"
The Token Syntax
Inside the string value, you use colon-wrapped tokens:
:my_image_key:— renders the font image defined asmy_image_keyin your font.yml:offset_-256:— moves the cursor left by 256 pixels (used to position images):offset_10:— moves the cursor right by 10 pixels
Client Compatibility
| Client | ESC menu works? | How |
|---|---|---|
| Vanilla Minecraft | ✅ Yes | Lang override (automatic) |
| Lunar Client | ✅ Yes | Via apollo_icon + Apollo-Bukkit plugin |
| Feather Client | ⚠️ Configurable | Set ignore_feather_client: true in settings.yml to skip ESC art for Feather players |
The CustomiZe! Folder
Where you configure gameplay mechanics — completely separate from the visual pack system.
Why Is It Separate?
The packs/ folder handles appearance — textures, models, sounds. The CustomiZe!/ folder handles behavior — how items work in the game.
This separation exists because many servers want to use third-party resource packs (bought or downloaded) exactly as-is, without modifying them. By keeping behavior config separate, you can use any pack's textures while fully controlling how those items work on your server.
Folder Structure
__global__/ ← Server-wide config (always loaded first)
items.yml ← Custom usable items with actions
swords.yml ← Custom swords with rarity and progression
axes.yml ← Custom axes (same format as swords)
armors.yml ← Custom armor pieces
blocks.yml ← Custom blocks with drops and rewards
pickaxes.yml ← Levelling pickaxes
harvesterhoes.yml ← Harvester hoes with auto-harvest
cosmetics.yml ← Wearable cosmetic items
gems.yml ← Gem socket definitions
sets.yml ← Armor set bonuses
defaulkttools/ ← Pack-specific overrides for "defaulkttools" pack
swords.yml ← Swords specific to this pack only
pickaxes.yml
gui.yml ← Functional items shown in /zitems for this pack
barrel_knight/
armors.yml
blocks.yml
packs/ ← Per-pack display browser files for /z gui
defaulkttools/
gui.yml ← Raw visual items shown in /z gui for this pack
How Merging Works
All CustomiZe!/*/swords.yml files are deep-merged together at load time. __global__ loads first, then each pack folder alphabetically. This means:
- You can add pack-specific swords in
CustomiZe!/my_pack/swords.ymlwithout touching the global file - All packs' items/blocks/swords/etc. are combined into one big list
- If two files define the same key, the later-loading file wins (alphabetical order)
Quick Reference — Which file for what?
| I want to configure... | File to edit |
|---|---|
| A clickable item with effects/commands | CustomiZe!/__global__/items.yml |
| A sword that levels up and changes texture | CustomiZe!/__global__/swords.yml |
| An armor piece with attributes | CustomiZe!/__global__/armors.yml |
| A placeable block with drops and Jobs XP | CustomiZe!/__global__/blocks.yml |
| A levelling pickaxe with area mining | CustomiZe!/__global__/pickaxes.yml |
| A harvester hoe with auto-replant | CustomiZe!/__global__/harvesterhoes.yml |
| How a pack appears in /zitems (functional items) | items/my_pack/gui.yml |
| How a pack appears in /z gui (display browser) | packs/my_pack/gui.yml |
| /zitems nav buttons | plugins/CustomiZer/gui/items_shop.yml |
| /z gui category browser appearance | plugins/CustomiZer/gui/main_menu.yml |
Custom Items
Usable items with click actions, cooldowns, limited uses, and food effects.
plugins/CustomiZer/CustomiZe!/__global__/items.ymlOr per-pack:
CustomiZe!/my_pack/items.ymlWhat Is a Custom Item?
A custom item is any item that does something special when right-clicked (or eaten). Examples: a scroll that runs a command, a health potion that restores hearts, a money bag that gives currency, a food item that applies potion effects.
Custom items are defined here. The texture comes from a pack item in packs/. You connect them by matching the MODELDATA number to the model_id in your pack.
Full Example
items:
  teleport_scroll:
    TYPE: PAPER                     # Vanilla material (must match the pack item's material)
    NAME: "&d✦ Teleport Scroll"
    LORE:
      - "&7Right-click to teleport to spawn."
      - "&8Cooldown: 30 seconds"
      - "&8Uses: &f%uses% &8remaining"
    MODELDATA: 12000               # Must match the model_id in your pack item definition
    COOLDOWN: 30                   # Seconds between uses
    USE: 5                         # Item breaks after 5 uses (-1 = unlimited)
    INTERACTS:
      - RIGHT_CLICK_AIR
      - RIGHT_CLICK_BLOCK
    ACTION:
      TYPE: COMMAND
      COMMAND: "spawn %player%"    # %player% is replaced with the player's name
All ACTION Types
| TYPE | Extra Fields Needed | What It Does |
|---|---|---|
COMMAND | COMMAND: "command here" | Runs a console command. Use %player% for player name. |
HEAL | — | Restores 2 hearts (4 health points) instantly. |
JUMP | DURATION: 10 | Gives Jump Boost II for N seconds. |
SPEED | DURATION: 10 | Gives Speed II for N seconds. |
REGEN | DURATION: 10 | Gives Regeneration II for N seconds. |
STRENGTH | DURATION: 10 | Gives Strength II for N seconds. |
LUCK | DURATION: 10 | Gives Luck II for N seconds. |
GOD | — | Makes player invulnerable (god mode). |
FLY | — | Enables creative-mode flight. |
MONEY | AMOUNT: 500 | Gives exactly that amount via Vault economy. |
RANDOMMONEY | AMOUNT: 100 + MAX_AMOUNT: 500 | Gives a random amount between min and max. |
JOBSBOOSTER | JOB_BOOST_MULTIPLIER: 1.5 + JOB_BOOST_DURATION: 300 | Boosts Jobs XP gains temporarily. |
EAT | Uses the FOOD block below | Item is eaten. Effects apply after consuming. |
NONE | — | Display-only item. Nothing happens on click. |
INTERACTS Options
Controls which clicks trigger the action:
| Value | When it triggers |
|---|---|
RIGHT_CLICK_AIR | Right-click while looking at the sky |
RIGHT_CLICK_BLOCK | Right-click while looking at a block |
SHIFT_RIGHT_CLICK_AIR | Shift + right-click in the air |
SHIFT_RIGHT_CLICK_BLOCK | Shift + right-click on a block |
Food Items
Any item can be made edible — even PAPER. Add a FOOD block and set ACTION TYPE: EAT:
items:
  magic_herb:
    TYPE: PAPER
    NAME: "&aMagic Herb"
    LORE:
      - "&7Eat to gain Regeneration and Speed."
    MODELDATA: 12010
    COOLDOWN: 0
    USE: -1
    INTERACTS: []       # Empty — eating triggers the action, not clicking
    ACTION:
      TYPE: EAT
    FOOD:
      NUTRITION: 4              # Hunger bars restored (2 = one drumstick)
      SATURATION: 0.6           # Saturation added (0.0–1.0)
      CAN_ALWAYS_EAT: true      # Player can eat this even when not hungry
      EFFECTS:
        - effect: REGENERATION
          duration: 200          # ticks (20 ticks = 1 second, so 200 = 10 seconds)
          amplifier: 1           # 0 = Level I, 1 = Level II, 2 = Level III
          chance: 1.0            # 100% chance
        - effect: SPEED
          duration: 100          # 5 seconds
          amplifier: 0           # Speed I
          chance: 0.5            # 50% chance — might not apply!
Lore Placeholders
In item lore you can use %uses% to show remaining uses dynamically. Color codes (&a, &6, etc.) and MiniMessage tags work in both NAME and LORE.
Custom Swords & Axes
Custom weapons with attributes, enchants, hit effects, elemental damage, and lifesteal. Every feature listed below is optional — a sword needs zero special config to work as a plain custom item.
CustomiZe!/__global__/swords.yml and CustomiZe!/__global__/axes.yml. Axes use the exact same format under an axes: root key instead of swords:.rarity: block entirely and the sword works fine.All Config Keys
| Key | Type | Required? | Default | Description |
|---|---|---|---|---|
type | String | Optional | IRON_SWORD | Vanilla material. Must match the pack item material. |
pack_id | String | Optional | — | Format: packName:itemId. If set, material and CMD are resolved from PackManager — skip type and custom_model_data. |
display_name | String | Optional | "Custom Sword" | Default name when no rarity tier is active. |
custom_model_data | Int | Optional | 0 | Fallback CMD when no rarity block is present. |
durability | Int | Optional | Material max | Custom durability tracked by the plugin (independent of vanilla damage). Stored in item NBT. |
HIDE-ENCHANTS | Boolean | Optional | false | Hides the enchantment glint and tooltip lines. |
lore | List<String> | Optional | [] | Base lore lines. Supports placeholders listed below and MiniMessage color tags. |
enchantments | Section | Optional | — | Map of enchantment name → level (see below). |
attributes | Section | Optional | — | Map of attribute name → flat value (see below). |
effects-enemy | Section | Optional | — | Potion effects applied to the hit enemy on each attack. |
effects-self | Section | Optional | — | Potion effects applied to the attacker on each hit. |
elemental_damage | String | Optional | "None" | Cosmetic/functional element: Fire, Ice, Lightning, Shadow, or None. |
rarity | Section | Optional | — | Kill-based upgrade system. Remove this block entirely for a static sword. See Levelling System. |
Attributes
Written as a flat map under attributes:. Values are added on top of the base material's default stats. All are optional — include only what you need.
| Attribute name | Effect | Example value |
|---|---|---|
GENERIC_ATTACK_DAMAGE | Flat attack damage added to hits | 8.0 |
GENERIC_ATTACK_SPEED | Attack speed (vanilla default ≈ 1.6) | 1.6 |
GENERIC_MAX_HEALTH | Bonus max health (2.0 = 1 extra heart) | 4.0 |
GENERIC_MOVEMENT_SPEED | Movement speed multiplier bonus | 0.02 |
GENERIC_KNOCKBACK_RESISTANCE | Reduces knockback received (1.0 = immune) | 0.5 |
GENERIC_LUCK | Luck modifier (affects loot tables) | 2.0 |
ADD_NUMBER operation.Enchantments
Written as enchantments: section with enchantment name (Bukkit Registry key) → level:
enchantments:
  sharpness: 5
  unbreaking: 3
  looting: 2
  fire_aspect: 2
  knockback: 2
  sweeping_edge: 3
Hit Effects (effects-enemy / effects-self)
Each entry under effects-enemy or effects-self is a potion effect key with two sub-keys:
| Sub-key | Type | Default | Description |
|---|---|---|---|
chance | Double (0.0–1.0) | 0.0 | Probability per hit. 1.0 = 100%, 0.5 = 50%. |
duration | Int (ticks) | 100 | How long the effect lasts. 20 ticks = 1 second. |
The effect name is the Bukkit PotionEffectType registry key. Common ones:
| Effect key | What it does |
|---|---|
slowness | Slows movement speed |
weakness | Reduces attack damage |
poison | Deals damage over time (won't kill below 1hp) |
wither | Deals damage over time (can kill) |
blindness | Narrows player's vision |
nausea | Screen wobble effect |
levitation | Lifts entity into the air |
strength | (self only) Increases your damage |
speed | (self only) Increases movement speed |
regeneration | (self only) Heals over time |
absorption | (self only) Adds absorption hearts |
resistance | (self only) Reduces incoming damage |
Elemental Damage
Set elemental_damage to one of these values. Each triggers a different effect on hit:
| Value | Effect on enemy |
|---|---|
Fire | Sets the target on fire |
Ice | Applies Slowness to the target |
Lightning | Strikes lightning at the target's location |
Shadow | Applies Blindness to the target |
None | No elemental effect (default) |
Lifesteal
Lifesteal is automatic when the rarity block is present — you do not configure it manually. The amount scales with the current rarity tier:
| Rarity tier | Lifesteal |
|---|---|
| Common | 0.01 HP flat per hit |
| Rare | 15% of damage dealt |
| Epic | 25% of damage dealt |
| Legendary | 35% of damage dealt |
| Mythic | 50% of damage dealt |
rarity: block). Static swords without a rarity block have no lifesteal.Lore Placeholders
| Placeholder | Replaced with |
|---|---|
%custom_durability% | Current remaining durability |
%max_custom_durability% | Maximum durability at this tier |
%rarity% | Current rarity tier name (only when rarity block exists) |
%progress% | Kills toward next upgrade |
%required% | Total kills required for next upgrade |
%total_kills% | All-time kills with this weapon |
%total_blocks% | Blocks broken with this sword |
Minimal Example (No Levelling)
swords:
  fire_sword:
    type: IRON_SWORD
    display_name: "&c&l🔥 Fire Sword"
    durability: 3000
    HIDE-ENCHANTS: true
    lore:
      - "&7A sword kissed by flame."
      - "&8Durability: %custom_durability% / %max_custom_durability%"
    attributes:
      GENERIC_ATTACK_DAMAGE: 8.0
      GENERIC_ATTACK_SPEED: 1.8
    enchantments:
      unbreaking: 3
      looting: 2
    effects-enemy:
      slowness:
        chance: 0.5        # 50% chance per hit
        duration: 60       # 3 seconds
    elemental_damage: Fire
Full Example (With Rarity Levelling)
swords:
  dragon_blade:
    type: IRON_SWORD
    display_name: "&4Dragon Blade"
    durability: 5000
    HIDE-ENCHANTS: true
    lore:
      - "&8Rarity: %rarity%"
      - "&8Progress: %progress% / %required% kills"
      - "&8Durability: %custom_durability% / %max_custom_durability%"
    attributes:
      GENERIC_ATTACK_DAMAGE: 10.0
      GENERIC_ATTACK_SPEED: 1.6
    enchantments:
      sharpness: 3
      looting: 2
    effects-enemy:
      slowness:
        chance: 0.40
        duration: 60
      weakness:
        chance: 0.25
        duration: 100
    effects-self:
      strength:
        chance: 0.15
        duration: 120
    elemental_damage: Fire

    # Remove this entire rarity block if you don't want levelling
    rarity:
      common:
        custom_model_data: 32001
        name: "&7Common Dragon Blade"
      rare:
        custom_model_data: 32002
        name: "&9Rare Dragon Blade"
      epic:
        custom_model_data: 32003
        name: "&5Epic Dragon Blade"
      legendary:
        custom_model_data: 32004
        name: "&6Legendary Dragon Blade"
      mythical:
        custom_model_data: 32005
        name: "&dMythical Dragon Blade"
Custom Armors
Armor pieces with stat bonuses, potion effects while worn, armor trim cosmetics, and 3D equippable models.
CustomiZe!/__global__/armors.ymlAll Config Keys
| Key | Type | Required? | Description |
|---|---|---|---|
type | String | Required (native mode) | Vanilla armor material, e.g. DIAMOND_HELMET. Used when NOT using pack_id. |
pack_id | String | Optional | Format: packName:itemId. If set, material and CMD are pulled from PackManager automatically — skip type, model_data. |
base_material | String | Optional | Override the underlying vanilla material for attribute slot binding only. E.g. set base_material: NETHERITE_CHESTPLATE so your custom leather chest gets netherite attribute slots. |
display_name | String | Required | Item name shown to players. Supports MiniMessage. |
lore | List<String> | Optional | Lore lines. Supports MiniMessage color tags. |
model_data | Int | Optional | Custom Model Data. Used in native mode (without pack_id). |
item_model | String | Optional | 1.21.4+ item model component (namespace:path). Alternative to CMD for newer Minecraft versions. |
attributes | List<Map> | Optional | Stat bonuses applied while the piece is worn. Each entry has attribute, amount, and operation. |
potion_effects | List<Map> | Optional | Potion effects applied while the armor is equipped; removed when it's taken off. |
trim | Section | Optional | Cosmetic armor trim. Keys: material and pattern. |
equippable | Section | Optional | 1.21.4+ equippable component for 3D worn models. Keys: model and equip_sound. |
Attributes
Attributes are a list. Each entry is a map with three keys: attribute, amount, and operation. All are bound to the armor's equipment slot automatically.
| Attribute name | Effect | Notes |
|---|---|---|
GENERIC_MAX_HEALTH | Bonus max health | 2.0 = 1 extra heart |
GENERIC_ARMOR | Armor points | 2.0 = 1 armor bar segment |
GENERIC_ARMOR_TOUGHNESS | Armor toughness | Reduces damage from high-damage hits |
GENERIC_MOVEMENT_SPEED | Walk speed bonus | 0.01 ≈ small speed increase |
GENERIC_KNOCKBACK_RESISTANCE | Reduces knockback | 1.0 = completely immune to knockback |
GENERIC_ATTACK_DAMAGE | Melee damage bonus | Works on armor too (rare use case) |
GENERIC_LUCK | Luck modifier | Affects loot table rolls |
Attribute Operations
| operation | Effect |
|---|---|
ADD_NUMBER | Adds a flat value. Most common for armor/health bonuses. |
ADD_SCALAR | Adds a percentage of the base attribute value. |
MULTIPLY_SCALAR_1 | Multiplies the base value by the given amount. |
Potion Effects (While Worn)
Each entry in potion_effects is a map with three keys:
| Key | Type | Description |
|---|---|---|
effect | String | Bukkit PotionEffectType key, e.g. fire_resistance, strength, speed, regeneration, night_vision, water_breathing |
duration | Int (ticks) | How long the effect lasts. Use a very large number like 999999 for permanent-while-worn. |
amplifier | Int | Effect level. 0 = Level I, 1 = Level II, 2 = Level III. |
Armor Trim
Adds a purely cosmetic pattern overlay on the armor texture. Both keys are required if you include the trim section.
trim:
  material: GOLD         # Trim color material (GOLD, IRON, DIAMOND, NETHERITE, etc.)
  pattern: WAVY          # Trim pattern (SENTRY, DUNE, COAST, WILD, WARD, EYE, VEX, TIDE,
                         # SNOUT, RIB, SPIRE, SILENCE, FLOW, BOLT, WAVY, SHAPER, RAISER, HOST)
Equippable (3D Worn Model)
The equippable section sets a 3D model that appears on the player's body when they wear the armor. Requires Minecraft 1.21.4+ clients.
equippable:
  model: "my_pack:dragon_armor"               # Resource location of the equippable model
equip_sound: "minecraft:item.armor.equip_diamond" # Sound when equippingpack_id, the equippable.model and equippable.equip_sound from the pack item are used by default. The equippable section in armors.yml overrides those values.Full Example
custom_armors:
  dragon_helmet:
    pack_id: "my_pack:dragon_helmet"   # Pulls material + CMD from PackManager

    display_name: "&4&lDragon Helmet"
    lore:
      - "&7Forged from dragonscale."
      - "&8+4 Max Health | +3 Armor"

    attributes:
      - attribute: GENERIC_MAX_HEALTH
        amount: 4.0
        operation: ADD_NUMBER        # +2 extra hearts
      - attribute: GENERIC_ARMOR
        amount: 3.0
        operation: ADD_NUMBER

    potion_effects:
      - effect: fire_resistance
        duration: 999999             # Permanent while worn
        amplifier: 0                 # Level I
      - effect: night_vision
        duration: 999999
        amplifier: 0

    trim:
      material: GOLD
      pattern: WAVY

    equippable:
      model: "my_pack:dragon_armor"
      equip_sound: "minecraft:item.armor.equip_diamond"
Custom Blocks — Gameplay Side
This file controls everything that happens when a custom block is placed or mined — hardness, blast resistance, drops, required tools, light emission, display name, lore, sounds, particles, and Jobs XP. It is the companion to packs/blocks.yml which only handles textures.
CustomiZe!/your_pack/blocks.yml (per-pack, recommended) or CustomiZe!/__global__/blocks.yml (global catch-all)The Two-File Rule (Quick Reminder)
| packs/your_pack/configs/blocks.yml | CustomiZe!/your_pack/blocks.yml |
|---|---|
| Texture, model ID, placement type, break sounds | Display name, lore, hardness, blast_resistance, break_with, drops, light_level, particles, XP rewards |
hardness and blast_resistance — belong in CustomiZe!. The packs/ folder is strictly for visuals.Full Block Configuration
Here is a complete example showing every available option for one block. Use only the fields you need — most are optional.
# CustomiZe!/my_pack/blocks.yml

blocks:
  silver_ore:
    # Links this entry to packs/my_pack/configs/blocks.yml → silver_ore
    # Format: "namespace:item_key"  (namespace = pack's info.namespace value)
    pack_id: "my_pack:silver_ore"

    # Rich display name shown in lore and break messages.
    # Supports MiniMessage tags (gradients, colours, bold, etc.)
    display_name: "Silver Ore"

    # Lore lines shown when the block item is in the player's hand.
    lore:
      - "A pale metallic ore."
      - "▸ Drops Raw Silver when mined."

    # Mining time — mirrors vanilla hardness values.
    # Higher = slower to mine. Omit to use vanilla NOTE_BLOCK timing (very fast).
    # Reference: stone=1.5, iron_ore=3.0, deepslate_ore=4.5, obsidian=50.0
    hardness: 3.0

    # Explosion resistance. Blocks with this set are fully protected from
    # TNT, creeper, and other explosion damage. Omit to allow destruction.
    blast_resistance: 3.0

    # Light emission level (0 = no light, 15 = full torch-level light).
    # When set above 0, the server places a hidden LIGHT block so real
    # light propagates. Players still see the ore texture, not the light block.
    light_level: 8

    # Whether the block drops its own block item when broken.
    # false = use the drops list below instead (recommended for ores)
    # true  = the block item itself drops (good for decorative blocks)
    drop_self: false

    # ── Which tools can break this block ──────────────────────────────────
    # List vanilla material names and/or custom pickaxe IDs from pickaxes.yml.
    # Omit this key entirely → any tool works (including bare hand).
    # Set to an empty list [] → completely indestructible in survival.
    break_with:
      - IRON_PICKAXE
      - GOLDEN_PICKAXE
      - DIAMOND_PICKAXE
      - NETHERITE_PICKAXE
      - silver_lithium_pickaxe    # A custom pickaxe key from CustomiZe!/pickaxes.yml

    # ── What the block drops when broken ──────────────────────────────────
    # Multiple drops are all rolled independently (each has its own chance).
    drops:
      # type: plugin_item — a custom item defined in CustomiZe!/items.yml
      - type: plugin_item
        item: "my_pack:raw_silver"   # format: "pack_namespace:item_key"
        amount: 1                     # exact amount
        chance: 100                   # 100 = always drops

      # Use amount_min / amount_max for a random range:
      - type: plugin_item
        item: "my_pack:silver_shard"
        amount_min: 0
        amount_max: 2
        chance: 40                    # 40% chance to drop 0–2 shards

      # type: vanilla — any standard Bukkit material name
      - type: vanilla
        item: EXPERIENCE_BOTTLE
        amount_min: 1
        amount_max: 1
        chance: 20                    # 20% chance

      # type: command — runs a console command when this block is broken
      # %player% is replaced with the breaker's name
      - type: command
        command: "eco give %player% 5"
        chance: 50                    # 50% chance to give 5 coins

    # Optional sound played to the breaker when the block is mined.
    # Use any Minecraft sound key (tab-complete with /playsound).
    soundeffectonmined: "block.amethyst_block.break"

    # Optional particle effect shown when the block is mined.
    # Use any Bukkit Particle enum name.
    visualeffectonmined: "VILLAGER_HAPPY"


  # ── Decorative block example (drop_self: true) ──────────────────────────
  oak_beam:
    pack_id: "my_pack:oak_beam"
    display_name: "&fOak Beam"
    lore:
      - "&7A decorative oak wood beam."
    hardness: 2.0            # Mines at log speed
    blast_resistance: 2.0
    drop_self: true          # Drops the block item itself (no drops list needed)
    break_with:
      - HAND                 # Can be broken by bare hand
      - WOODEN_AXE
      - STONE_AXE
      - IRON_AXE
      - GOLDEN_AXE
      - DIAMOND_AXE
      - NETHERITE_AXE


# ── XP and money rewards ─────────────────────────────────────────────────────
# Works for BOTH your custom pack blocks AND vanilla Minecraft blocks.
# Add this section anywhere in the file (or in __global__/blocks.yml).
xp_values:

  # Custom block: use "namespace:item_key" (same as pack_id above)
  my_pack:silver_ore:
    name: "Silver Ore"
    jobsxp: 8.0              # XP given to the Jobs plugin job
    job: "Miner"             # The Jobs job name (must match your jobs config)
    money: 5.0               # Vault economy money given to the player
    points: 2.0              # Server points / custom currency
    cancel-vanilla-drops: false   # true = stop vanilla drops (useful for custom ores)

  # Vanilla block: use the Bukkit material name
  COAL_ORE:
    name: "Coal Ore"
    jobsxp: 2.0
    job: "Miner"
    money: 1.0
    points: 0.5
    cancel-vanilla-drops: false
All Fields at a Glance
| Field | Required? | Description |
|---|---|---|
pack_id | required | Links to the packs/ entry. Format: "namespace:item_key" |
display_name | optional | MiniMessage display name shown in break messages and lore |
lore | optional | List of lore lines on the block item |
hardness | optional | Mining time. stone≈1.5, iron_ore≈3.0, deepslate≈4.5, obsidian≈50. Omit = instant (vanilla NOTE_BLOCK speed) |
blast_resistance | optional | When set, the block is fully protected from explosions. Omit = can be blown up |
light_level | optional | 0–15 light emission. Uses a hidden LIGHT block server-side |
drop_self | optional | true = drops its own block item. false = use drops list |
break_with | optional | List of tool materials + custom pickaxe IDs. Omit = any tool. [] = indestructible |
drops | optional | List of drop entries. Each has type, item, amount/amount_min/amount_max, chance |
soundeffectonmined | optional | Minecraft sound key played to the breaker on break |
visualeffectonmined | optional | Bukkit Particle enum name shown on break |
iscaveblock | optional | Special CaveBlock config (see the CaveBlock section) |
Drop Types
| type | item value format | Example |
|---|---|---|
plugin_item | "pack_namespace:item_key" | A custom item configured in CustomiZe!/items.yml |
vanilla | Bukkit Material name | DIAMOND, EXPERIENCE_BOTTLE, IRON_INGOT |
command | Console command string (%player% is replaced) | "eco give %player% 50" |
Custom Pickaxes
Pickaxes that level up as players mine — each level unlocks new textures, area mining, and Haste effects.
CustomiZe!/__global__/pickaxes.ymlHow Pickaxe Levelling Works
Each pickaxe tracks how many blocks the player has mined with it. When the count reaches blocks_required for the current level, the pickaxe automatically upgrades to the next level. The upgrade:
- Changes the Custom Model Data → new texture appears
- Increases durability, mining radius, and effect level
- Updates the lore to show the new stats
- Notifies the player
Full Configuration Example
pickaxes:
  tier_pickaxe:
    type: DIAMOND_PICKAXE
    display_name: "⛏ Tier Pickaxe"
    lore:
      - "⛏ Level: %level% / %max_level%"
      - "Blocks mined: %blocks_mined% / %blocks_required%"
      - "Durability: %current_durability% / %max_durability%"
      - "Mining area: %radius%×%radius%"
      - "%bonuses%"

    levels:
      # Level 1 — Starting tier
      1:
        name: "⛏ Tier Pickaxe [Lvl. 1]"
        custom_model_data: 30041        # Texture for level 1 (wooden-looking)
        durability: 2000
        radius: 1                       # Mines 1×1 (just the block you click)
        height_radius: 0                # 0 = only the exact height level mined
        effect_on_hold: haste
        effect_amplifier: 0             # 0 = Haste I
        blocks_required: 200            # Mine 200 blocks to reach level 2
        bonus:
          - "• Haste I while held"

      # Level 2
      2:
        name: "⛏ Tier Pickaxe [Lvl. 2]"
        custom_model_data: 30042        # New texture (stone-looking)
        durability: 4000
        radius: 1
        height_radius: 1               # Mines 1 block above and below too (3 tall)
        effect_on_hold: haste
        effect_amplifier: 0
        blocks_required: 500
        bonus:
          - "• Haste I while held"
          - "• 1×3 column mining"

      # Level 3
      3:
        name: "⛏ Tier Pickaxe [Lvl. 3]"
        custom_model_data: 30043        # New texture (iron-looking)
        durability: 7000
        radius: 3                       # Mines 3×3 area
        height_radius: 1
        effect_on_hold: haste
        effect_amplifier: 1             # Haste II
        blocks_required: 1000
        bonus:
          - "• Haste II while held"
          - "• 3×3 area mining"

      # Level 4 — Final tier
      4:
        name: "⛏ Tier Pickaxe [Lvl. 4]"
        custom_model_data: 30044        # New texture (diamond/netherite-looking)
        durability: 12000
        radius: 3
        height_radius: 3               # Mines 3×7 tall area
        effect_on_hold: haste
        effect_amplifier: 1
        blocks_required: 0             # 0 = MAX LEVEL, no further upgrade
        bonus:
          - "• Haste II while held"
          - "• 3×7 area mining"
          - "• MAX LEVEL"
All Per-Level Config Keys
| Key | Type | Required? | Default | Description |
|---|---|---|---|---|
name | String | Optional | — | Display name at this level. Supports MiniMessage. |
lore | List<String> | Optional | — | Lore lines at this level. Supports all placeholders below. |
custom_model_data | Int | Optional | 0 | CMD for the texture at this level. |
pack_id | String | Optional | — | Per-level pack item override (format: packName:itemId). |
durability | Int | Optional | Material max | Custom durability for this level. The plugin tracks it independently of vanilla damage. |
blocks_required | Int | Optional | 0 | Blocks to mine to advance to the next level. Set to 0 on the last level — this signals it is the max level. |
radius | Int | Optional | 1 | Horizontal mining radius. 1 = 1×1 (single block), 3 = 3×3 area. |
height_radius | Int | Optional | 0 | Vertical mining radius. 0 = only the exact block, 1 = one block above and below (3 tall), 3 = 7 tall. |
two_blocks | Boolean | Optional | false | Shortcut for height_radius: 1. Set to true to mine 1×3 (one block above + below target). |
down_depth | Int | Optional | 0 | Column depth mined downward from the clicked block. Useful for column-mining hoes or shaft pickaxes. |
effect_on_hold | String | Optional | — | Potion effect type applied while this pickaxe is held in the main hand (e.g. haste, speed). |
effect_amplifier | Int | Optional | 0 | Effect amplifier. 0 = Level I, 1 = Level II. |
bonus | List<String> | Optional | — | Flavor lines shown via the %bonuses% lore placeholder at this level. |
Lore Placeholders
| Placeholder | Shows |
|---|---|
%level% | Current level number |
%max_level% | Highest defined level |
%blocks_mined% | Blocks mined toward the next level |
%blocks_required% | Blocks needed for next level (0 at max) |
%total_blocks% | All-time blocks mined with this pickaxe |
%current_durability% | Remaining custom durability |
%max_durability% | Maximum durability at current level |
%radius% | Horizontal mining radius number (e.g. 3 for 3×3) |
%height_radius% | Vertical mining radius number |
%down_depth% | Column depth mined downward |
%bonuses% | All bonus lines for current level (multi-line) |
Harvester Hoes
Auto-harvesting, auto-replanting hoes with an XP-based levelling system, custom drop tables, and Vault economy auto-sell. The levelling system is built-in.
CustomiZe!/__global__/harvesterhoes.ymlHow Harvester Hoes Work
When a player right-clicks a crop with a configured harvester hoe, the plugin:
- Checks if the crop type is in
supported-cropsfor this hoe - Harvests the crop and optionally drops custom items (from the
dropstable) - If
auto-replantis enabled, replants the crop atreplant-growth-stage - If
auto-sellis enabled, deposits money for the harvest directly to the player's balance - Grants XP from
xp-valuesand checksexperience.level-up-requirementsfor a level-up - Decrements
usesby 1. When uses hit 0, the hoe breaks.
Top-Level Hoe Keys
| Key | Type | Required? | Description |
|---|---|---|---|
base-item | String | Optional | Vanilla hoe material. Default: WOODEN_HOE. Use any hoe type: WOODEN_HOE, STONE_HOE, IRON_HOE, GOLDEN_HOE, DIAMOND_HOE, NETHERITE_HOE. |
pack_id | String | Optional | Format: packName:itemId. If set, material and CMD are resolved from PackManager. Per-level pack_id inside abilities overrides this. |
custom-model-data | Int | Optional | Default CMD. Overridden by the active ability level's model-data. |
name | String | Optional | Fallback display name used when the active ability level has no name. Default: "Harvester Hoe". |
uses | Int | Optional | Base number of uses at level-0. Default: 10. This is multiplied by each level's use-multiplier on level-up. |
lore | List<String> | Optional | Fallback lore. Each ability level can have its own lore that overrides this. |
supported-crops | List<String> | Required | Vanilla crop block types this hoe can harvest. See list below. |
xp-values | Section | Optional | XP granted per harvested crop type. Key is material name, value is XP amount. Special key CUSTOM_CROP covers custom crops. Default: 1 per harvest. |
drops | Section | Optional | Custom drop table per crop type. If defined, overrides vanilla drops. If not defined, vanilla drops are used. |
experience | Section | Optional | XP level-up threshold configuration. Required only if you want levelling. |
abilities | Section | Required | Per-level ability configuration. Must contain at least level-0. |
Supported Crops (supported-crops)
Use vanilla Minecraft block material names:
| Material name | Crop |
|---|---|
WHEAT | Wheat stalks |
CARROTS | Carrot plants |
POTATOES | Potato plants |
BEETROOTS | Beetroot plants |
NETHER_WART | Nether wart |
MELON_STEM | Melon stem (the growing stalk) |
PUMPKIN_STEM | Pumpkin stem |
COCOA | Cocoa beans |
SWEET_BERRY_BUSH | Sweet berry bushes |
| Any other crop block | Any full-grown vanilla crop block |
Abilities (Levelling System)
The abilities section is where the levelling system lives. Each sub-key is a level name (e.g. level-0, level-1). level-0 is the starting state when the hoe is first created. The plugin upgrades to the next level name when XP thresholds are hit.
Per-Level Ability Keys
| Key | Type | Required? | Description |
|---|---|---|---|
name | String | Optional | Display name for the hoe at this level. Supports MiniMessage. |
lore | List<String> | Optional | Lore lines for this level. Use <uses> for remaining uses. |
model-data | Int | Optional | Custom Model Data at this level. Allows the texture to change per level. |
pack_id | String | Optional | Per-level pack item override (format: packName:itemId). Overrides top-level pack_id. |
use-multiplier | Int | Optional | On level-up, new uses = base_uses × use-multiplier. Default: 1 (no change). Set to 2 to double the uses at this level. |
drop-multiplier | Int | Optional | Multiplies the quantity of drops from the drops table. Default: 1. Set to 2 for double drops. |
auto-sell | Boolean | Optional | If true, harvested crops are automatically sold for money via Vault instead of dropping on the ground. Default: false. |
auto-replant | Boolean | Optional | If true, the crop is automatically replanted after harvest. Default: false. |
replant-growth-stage | Int | Optional | The growth stage the crop is reset to after replanting. Default: 0 (seed stage). Use higher values to skip early growth stages. |
XP Levelling (experience)
The experience.level-up-requirements section maps level names to cumulative XP totals. When the player's accumulated XP reaches the threshold, the hoe upgrades to that level automatically:
experience:
  level-up-requirements:
    level-1: 100     # Reach 100 XP → upgrade to level-1
    level-2: 300     # Reach 300 total XP → upgrade to level-2
    level-3: 600     # Reach 600 total XP → upgrade to level-3
XP is gained per harvest. The amount comes from xp-values:
xp-values:
  WHEAT: 5           # +5 XP per wheat harvested
  CARROTS: 7         # +7 XP per carrot
  POTATOES: 6        # +6 XP per potato
CUSTOM_CROP: 3 # XP for any custom crop (from CustomiZer's crop system)xp-values, the default XP is 1 per harvest. You don't need to list every crop — only the ones you want custom XP for.Custom Drop Table (drops)
Defines what items drop when a crop is harvested. Organized by crop material → named drop entries:
drops:
  WHEAT:                          # Crop type
    wheat_item:                   # Any unique key for this drop entry
      item: WHEAT                 # Vanilla material name OR vanilla mapping
      chance: 1.0                 # 0.0–1.0 probability (1.0 = 100%)
      quantity: 1                 # How many to drop
    seeds:
      item: WHEAT_SEEDS           # Wheat seeds as a bonus drop
      chance: 0.5                 # 50% chance
      quantity: 2

  CARROTS:
    carrot_drop:
      item: CARROT                # Note: plugin auto-maps CARROTS block → CARROT item
      chance: 1.0
      quantity: 1
    bonus_carrot:
      item: CARROT
      chance: 0.3
quantity: 3CARROTS→CARROT, POTATOES→POTATO, BEETROOTS→BEETROOT. Use the item name in the item: field.Auto-Sell Prices (economy)
Required if any ability level has auto-sell: true. Price is per unit, multiplied by the current level's drop-multiplier:
economy:
  sell-prices:
    WHEAT: 50.0        # 50 coins per wheat
    CARROTS: 75.0
    POTATOES: 60.0
    BEETROOTS: 45.0
Messages
All message keys are optional. If not defined, no message is sent for that event.
| Key | Available placeholders | When shown |
|---|---|---|
messages.exp-gain | {amount}, {total}, {hoe} | After each harvest grants XP |
messages.level-up | {level}, {hoe} | When the hoe levels up |
messages.auto-sell | {amount}, {item} | When crops are auto-sold |
Lore Placeholders
Only one special placeholder exists for hoe lore:
| Placeholder | Format | Replaced with |
|---|---|---|
<uses> | Angle brackets | Remaining uses before the hoe breaks |
<uses> with angle brackets — not the percent-sign format used by swords and pickaxes. This is intentional.Full Example
hoes:
  harvest_hoe:
    base-item: GOLDEN_HOE
    custom-model-data: 10000        # Starting CMD (level-0 CMD overrides this)
    name: "🌾 Harvest Hoe"
    uses: 100                       # Base uses at level-0

    supported-crops:
      - WHEAT
      - CARROTS
      - POTATOES
      - BEETROOTS

    xp-values:
      WHEAT: 5
      CARROTS: 7
      POTATOES: 6
      BEETROOTS: 4

    experience:
      level-up-requirements:
        level-1: 100
        level-2: 300
        level-3: 700

    drops:
      WHEAT:
        wheat:
          item: WHEAT
          chance: 1.0
          quantity: 1
        seeds:
          item: WHEAT_SEEDS
          chance: 0.4
          quantity: 1

    abilities:
      level-0:
        name: "&7🌾 Harvest Hoe [Lv.0]"
        lore:
          - "&8Uses: &f<uses>"
          - "&7Harvest crops automatically."
        model-data: 10000
        use-multiplier: 1
        drop-multiplier: 1
        auto-sell: false
        auto-replant: true
        replant-growth-stage: 0

      level-1:
        name: "&a🌾 Harvest Hoe [Lv.1]"
        lore:
          - "&8Uses: &f<uses>"
          - "&7+50% drops | Auto-replant"
        model-data: 10001           # New texture
        use-multiplier: 2           # 100 × 2 = 200 uses at this level
        drop-multiplier: 2          # 50% more drops (int, so effectively doubles)
        auto-sell: false
        auto-replant: true

      level-2:
        name: "&6🌾 Harvest Hoe [Lv.2]"
        lore:
          - "&8Uses: &f<uses>"
          - "&7Auto-sell enabled | Double drops"
        model-data: 10002
        use-multiplier: 3           # 100 × 3 = 300 uses
        drop-multiplier: 2
        auto-sell: true             # Crops sold directly to wallet
        auto-replant: true

economy:
  sell-prices:
    WHEAT: 50.0
    CARROTS: 75.0
    POTATOES: 60.0
    BEETROOTS: 45.0

messages:
  exp-gain: "&aGained &f{amount} &aXP! &8Total: &f{total}"
  level-up: "&6🎉 Your {hoe} levelled up to &e{level}&6!"
  auto-sell: "&aAuto-sold crops for &6{amount} coins."
Cosmetics
Wearable display items — hats, back items, wings — that players can equip without replacing armor.
CustomiZe!/__global__/cosmetics.ymlcosmetics:
cool_hat:
pack_id: "my_pack:cool_hat" # References the pack item for texture
display_name: "✦ Cool Hat"
slot: hat # Where to equip: hat | back | wings | offhand
lore:
- "A very stylish hat."
- "Right-click to equip or swap!"
permission: "myserver.hats.cool" # Optional — only players with this perm can use it
angel_wings:
pack_id: "my_pack:angel_wings"
display_name: "🪶 Angel Wings"
slot: back | Slot | Inventory Position | Usage |
|---|---|---|
hat | HEAD slot | Hats, crowns, helmets |
back | CHESTPLATE slot | Capes, backpacks, wings |
wings | CHESTPLATE slot | Alias for back |
offhand | OFF_HAND slot | Carried cosmetics |
Backpacks
Physical backpack items that open a persistent inventory. The inventory is bound to the item, not the player — trade the backpack to transfer all its contents.
CustomiZe!/<pack>/backpacks.ymlHow it works
- Every backpack item gets a unique UUID stamped in its PDC (
customizer:backpack_instance_uuid) when given. - The inventory is stored by that UUID (SQLite or MongoDB) — so two backpacks of the same type have separate inventories.
- Players run
/backpackwhile holding the backpack in their offhand (or wearing it on their chestplate) to open it. - Hoppers and plugins cannot move items into or out of an open backpack inventory.
storage:
  type: sqlite          # "sqlite" or "mongodb"
  sqlite:
    file: db/backpacks.db  # stored in plugins/CustomiZer/db/

backpacks:
  adventure_backpack_1:
    pack_id: "elitecreatures:adventure_backpack_cosmetic_backpack_1"
    display_name: "<gold><bold>🎒 Adventure Backpack I"
    slots: 18           # 9, 18, 27, 36, 45, or 54  (or use rows: 1-6)
    permission: "myserver.backpack.tier1"   # optional
    lore:
      - "<dark_gray>18 slots"
      - "<gray>Wear on chest or hold in offhand, run <yellow>/backpack"

  large_backpack:
    pack_id: "elitecreatures:large_backpack"
    display_name: "<green>🎒 Large Backpack"
rows: 4 # equivalent to slots: 36| Key | Default | Description |
|---|---|---|
pack_id | required | The CustomiZer pack item ID that provides the texture/model. |
display_name | required | MiniMessage title shown in the inventory and on the item. |
slots | 27 | Total slots — must be a multiple of 9, max 54. Alternatively use rows: 1–6. |
permission | none | If set, only players with this permission can open the backpack. |
lore | none | List of MiniMessage lore lines added to the item. |
Giving backpacks
Add the backpack as a type: backpack entry in your gui.yml — it will appear in /zitems and clicking gives the physical item (with UUID stamped and lore applied):
items:
  - type: backpack
    pack: elitecreatures
    id: adventure_backpack_cosmetic_backpack_1
    name: "<gold><bold>🎒 Adventure Backpack I"
    lore:
      - "<dark_gray>18 slots"
      - "<gray>Hold in offhand → /backpack"
Storage backends
| Type | Config key | Notes |
|---|---|---|
| SQLite | type: sqlite | Default. Single file, zero setup. Fine for most servers. |
| MongoDB | type: mongodb | Better for very large player counts or shared clusters. Requires a mongodb: sub-section with uri, database, and collection. |
Gem Sockets
A socketing system where players insert gems into weapons and armor for stat bonuses that wear down over time.
CustomiZe!/__global__/gems.yml · per-pack: CustomiZe!/<pack>/gems.ymlExample — Steve sockets a 🔥 Fire Rune into his sword
A full walkthrough of how a player uses /zsocket from start to finish. The Fire Rune adds +2.5 Attack Damage, so it goes into a weapon.
Steve has a 🔥 Fire Rune in his inventory
He obtained it from a pack reward or /z give weekly_dot1 fire_rune. Hovering it shows:
Steve runs /zsocket
The Gem Socket Station GUI opens. The top half is the socket interface; the bottom half is his personal gem bag showing every gem currently in his inventory.
Steve drags his sword into the center target slot
He picks up his sword from his inventory and drops it into slot 4 (the center top slot). An admin had already added 1 socket with /zsocket add 1.
The sword has 1 socket — it glows green. Sockets 2–4 are red (locked). The 🔥 Fire Rune appears in the gem bag below because it's in Steve's inventory.
Steve clicks the 🔥 Fire Rune in the gem bag
The plugin removes the gem from his inventory, inserts it into Socket 1, and immediately applies +2.5 Attack Damage as an attribute modifier on the sword. Chat confirms:
The GUI updates — socket 1 now shows the gem with 100 uses
Hovering Socket 1 shows:
Steve closes the GUI and holds his sword
The sword is returned to his inventory on close. Its lore and Minecraft attribute tooltip now show the bonus:
Every 60 seconds while the sword is held or equipped, the Fire Rune loses 1 use. At 0 uses the gem crumbles, the +2.5 damage is removed, and Steve sees:
Time does not tick while the item is sitting in the Socket Station GUI.
/zsocket add <count> (requires cxp.socket.add) while holding an item to add socket slots to it. Then share the item with players — they use /zsocket to open the GUI and socket their own gems.
Config Reference
socket_char: "◈"
empty_socket_lore: "◈ Empty Socket"
max_sockets: 4

# Default uses for gems that don't set their own. -1 = unlimited.
default_max_uses: -1

gem_decay:
  enabled: true
  interval_seconds: 60   # 1 use consumed per minute of equip time

gems:
  water_rune:
    display_name: "💧 Water Rune"
    type: PAPER
    model_data: 200377
    tier: 2
    stat: armor
    value: 1.5
    max_uses: 100          # -1 for unlimited
    lore:
      - "Tier: Awakened"
- "+1.5 Armor when socketed." | stat value | Effect |
|---|---|
attack_damage | Flat attack damage (+1.5 = 1.5 more damage) |
armor | Armor points (1.0 = one half-armor pip) |
armor_toughness | Reduces armor penetration |
movement_speed | Speed multiplier (0.01 ≈ 1%) |
max_health | Extra hearts (2.0 = 1 full heart) |
luck | Vanilla luck attribute |
Armor Sets
Equip N matching armor pieces to unlock bonuses — potion effects, console commands, and messages. Bonuses activate and deactivate automatically as pieces are equipped or removed.
CustomiZe!/__global__/sets.ymlHow Sets Work
Each armor piece registered in armors.yml has a unique key (e.g. dragon_helmet). The sets.yml file groups those keys into sets and defines what happens at each threshold (2 pieces equipped, 3 pieces, 4 pieces, etc.).
Every time a player equips or unequips armor, the plugin:
- Counts how many pieces of each set the player has equipped
- Compares the new count to the previous count
- If the count crossed a threshold upward → applies effects, runs commands, sends activation message
- If the count crossed a threshold downward → removes effects, sends deactivation message
Config Keys
| Key | Type | Required? | Description |
|---|---|---|---|
sets.{id}.pieces | List<String> | Required | Armor piece keys from armors.yml that form this set. The plugin counts how many of these the player is wearing. |
sets.{id}.bonuses | Section | Optional | Map of piece-count threshold → bonus config. Key is a number string: "2", "3", or "4". |
bonuses.{N}.message | String | Optional | Sent to the player when they cross this threshold (up or down). Supports MiniMessage. |
bonuses.{N}.potion_effects | List<Map> | Optional | Potion effects applied when threshold is crossed upward. Removed when crossed downward. |
bonuses.{N}.commands | List<String> | Optional | Console commands run when the threshold is crossed upward. Use {player} for the player name. |
Potion Effect Map Keys
| Key | Type | Description |
|---|---|---|
effect | String | Bukkit PotionEffectType key (e.g. strength, fire_resistance, speed, regeneration, resistance) |
duration | Int (ticks) | Effect duration. Use 999999 for effectively permanent while the set is worn. |
amplifier | Int | 0 = Level I, 1 = Level II, 2 = Level III |
potion_effects instead, which the plugin removes automatically.Full Example
sets:
  dragon:
    pieces:
      - dragon_helmet
      - dragon_chestplate
      - dragon_leggings
      - dragon_boots

    bonuses:
      "2":                                         # Wearing 2 out of 4 pieces
        message: "&c&l★ 2-Piece Dragon: &fStrength I active!"
        potion_effects:
          - effect: strength
            duration: 999999                       # Permanent while worn
            amplifier: 0                           # Strength I

      "4":                                         # Full set bonus
        message: "&4&l★ Full Dragon Set! &cFire Resistance + Strength II!"
        potion_effects:
          - effect: fire_resistance
            duration: 999999
            amplifier: 0
          - effect: strength
            duration: 999999
            amplifier: 1                           # Strength II (overrides 2-piece Strength I)
        commands:
          - "broadcast &4{player} &chas assembled the full Dragon Set!"
Custom Crops
Persistent, multi-stage crops with generated or custom models, configurable growth conditions, dynamic hitboxes, stage effects, age-aware loot tables, edible harvest items, and plugin events.
plugins/CustomiZer/packs/<pack-id>/. The bundled example is plugins/CustomiZer/packs/customcrops/. A crop is discovered from its model or texture folder; a YAML file by itself does not register a crop.What the Crop System Does
- Scans every folder inside
plugins/CustomiZer/packs/for aModels/orTextures/crop layout. - Detects each crop's stages from correctly named model or texture files.
- Assigns stable CustomModelData values for the seed and every stage. The assignments are saved and reused after restarts.
- Creates a plantable seed item tagged with the crop ID.
- Displays the planted crop with a packet-based ItemDisplay and uses an invisible Interaction entity as its clickable hitbox.
- Checks growth every 30 seconds, changes the model and hitbox as the age increases, and saves placed crops across restarts.
- Rolls an age-aware loot table when the crop is right-clicked or broken.
Crop Lifecycle In Game
The following screenshots show the complete visible lifecycle: planting a seed, growing through the configured models, reaching the final stage, and breaking a mature tomato crop to receive its configured tomato drop.
1. Planting the Seed (Age 0)
Right-click the configured placement.bottom_block with the crop's tagged seed. The seed is consumed in Survival mode and the first crop model appears in the empty block above.
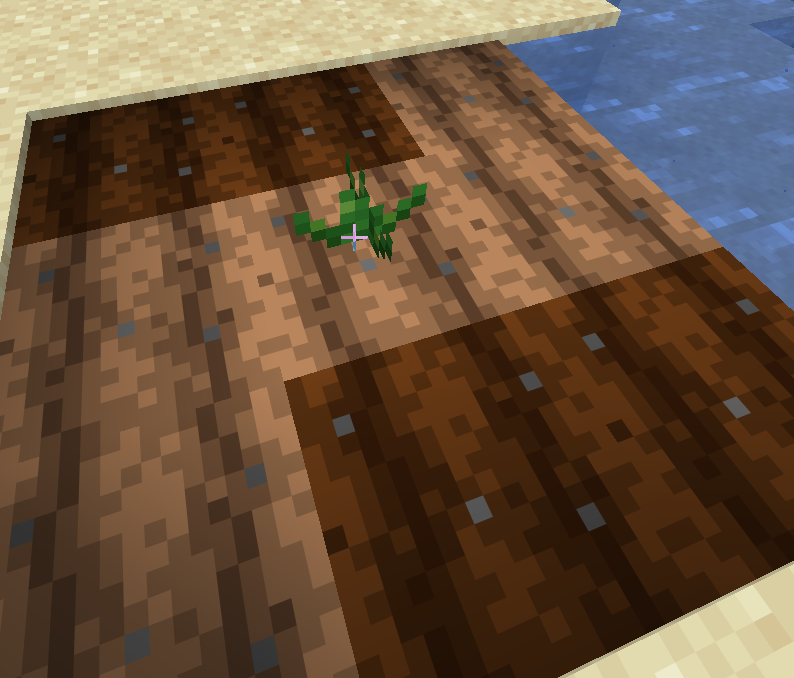
2. Growing Through the Stages
As growth checks succeed, each crop advances one age at a time. Its model and clickable hitbox update to match the new stage. This example field shows several custom crops at different growth stages.
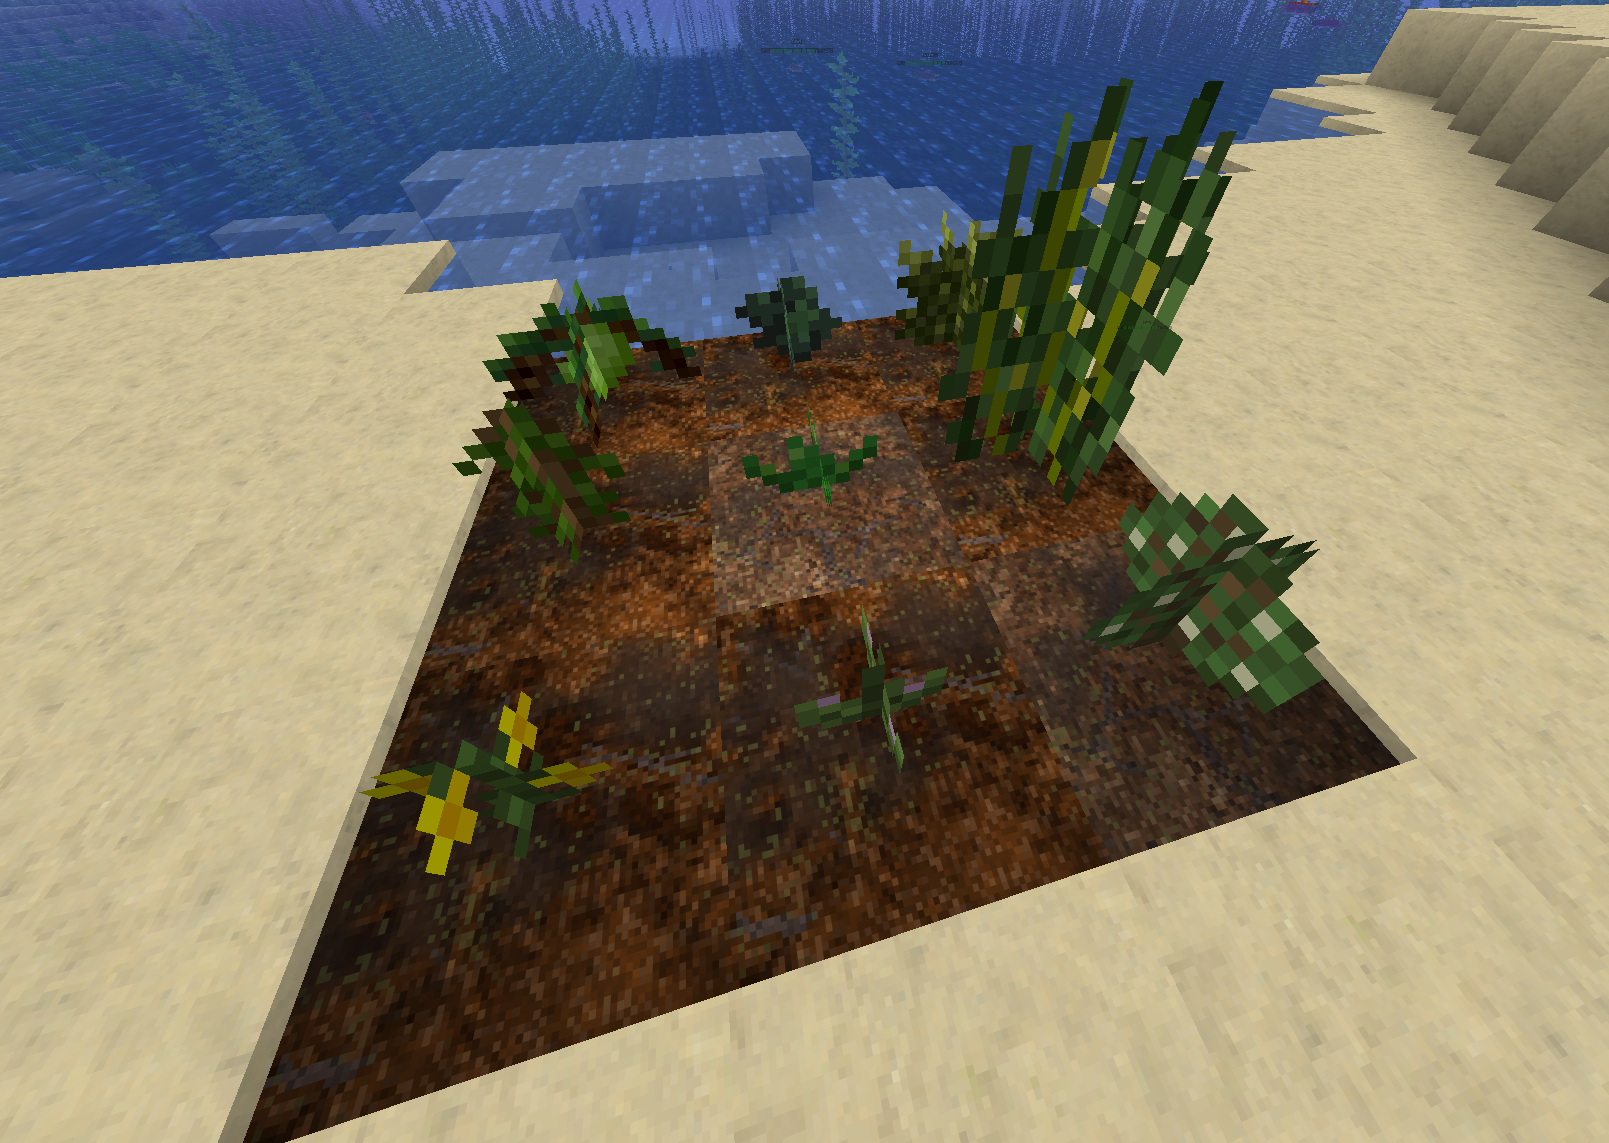
3. Final Stage (Ready to Harvest)
When a crop reaches its highest detected age, it uses the final stage model. If ready_effect is configured, particles mark the crop as mature and continue appearing every growth check while it remains ready.
Tomato Drop Example
In this example, the highlighted mature tomato plant matches a loot entry configured with item: "pack:my_farm_pack:tomato" and a final-stage age condition.
Before Breaking
The mature tomato crop is still planted and displaying its final model.
After Breaking
The crop is removed and the configured custom tomato item drops naturally at its location.
item_drops:. Its item, amount range, chance, and allowed crop ages all come from that entry.Creating a Crop Pack
Create one pack folder and choose one of the two supported visual layouts. If a pack contains a Models/ directory, the scanner prefers it and does not scan that pack's Textures/ directory for crops.
Option A: PNG Textures (Automatic Models)
plugins/CustomiZer/packs/my_farm_pack/
├── Textures/
│   └── tomato/
│       ├── tomato_crop_stage0.png
│       ├── tomato_crop_stage1.png
│       └── tomato_crop_stage2.png
└── configs/
    └── tomato.yml
The exact texture pattern is <crop-id>_crop_stage<age>.png. CustomiZer generates:
- A flat seed item model using the stage 0 texture.
- A crossed-plane crop model for every detected stage.
- Resource-pack textures under
assets/customizer/textures/crop/<crop-id>_<age>.png.
Option B: Pre-Built JSON Models
plugins/CustomiZer/packs/my_farm_pack/
├── Models/
│   └── tomato/
│       ├── tomato_seed.json
│       ├── tomato_crop_stage_0.json
│       ├── tomato_crop_stage_1.json
│       └── tomato_crop_stage_2.json
├── configs/
│   └── tomato.yml
└── resourcepack/
    └── assets/
        └── my_farm_pack/
            ├── models/
            └── textures/
The exact stage model pattern is <crop-id>_crop_stage_<age>.json. The seed model is <crop-id>_seed.json. Missing seed or stage models fall back to generated models. Model JSON may reference namespaced textures and parent models; place those assets in the pack's normal resourcepack/assets/ structure.
maxAge. For files 0, 1, and 2, the crop has three visual stages and a maximum age of 2. Keep stages continuous from 0. The current loader does not use growth.max_age to create stages.0 through 18. Higher detected stages are truncated.Pack Items for Harvests and Seeds
If loot should drop a textured pack item, define that item in a normal pack item config. The item ID used by the crop must match the ID under items:.
# plugins/CustomiZer/packs/my_farm_pack/configs/farm_items.yml
info:
  namespace: my_farm_pack

items:
  tomato:
    display_name: "Tomato"
    resource:
      generate: false
      material: APPLE
      model_path: custom/items/tomato

  tomato_seed:
    display_name: "Tomato Seed"
    resource:
      generate: false
      material: WHEAT_SEEDS
model_path: custom/items/tomato_seeditem: "pack:my_farm_pack:tomato" in crop loot. The full pack:<pack-id>:<item-id> prefix is required. For a plantable seed, use item: "crop_seed"; this creates the correctly tagged seed for the current crop.Complete Crop Configuration
# plugins/CustomiZer/packs/my_farm_pack/configs/tomato.yml
seed:
  id: tomato_seed                    # Logical seed ID; default: tomato_seed
  material: WHEAT_SEEDS              # Vanilla base material of the generated seed

growth:
  max_age: 2                         # Informational in the current loader; files determine max age
  avg_seconds_per_stage: 120         # Average target time for each stage
  min_light: 7                       # Growth pauses below this block light level

placement:
  bottom_block: FARMLAND             # Exact Bukkit material that must be clicked

hitbox:
  auto_height_step: 0.1              # Default height = max(0.2, step * (age + 1))

# Optional exact hitboxes override the automatic size for listed ages
hitboxes:
  "0":
    width: 0.75
    height: 0.25
  "2":
    width: 0.9
    height: 0.8

sounds:
  place: minecraft:item.crop.plant   # Successful planting
  break: minecraft:block.crop.break  # Left-click or environmental break
  interact: minecraft:block.crop.hit # Right-click harvest
  grow: minecraft:block.grass.place  # Optional; every successful age increase

loot:
  drop_seed_if_immature: true        # Currently stored but not used by loot rolling
  decrease_age_on_harvest: -1        # -1 removes crop; 0 keeps same age; N subtracts N ages

multipliers:
  bonemeal: 0.3                      # Present in config, but currently not used by interaction code
  max_moisture: 0.2                  # +20% in swamp, jungle, or forest biome names
  rain: 0.1                          # +10% while storming without thunder
  thunderstorm: -0.3                 # -30% while thundering
  snow: -0.5                         # -50% in snow, frozen, or ice biome names

ready_effect:
  particle: HAPPY_VILLAGER           # Bukkit Particle enum name; omit for no ready particles
  count: 6                           # Ambient count; maturity burst uses count * 3

stage_effects:
  "1":
    particle: COMPOSTER               # Bukkit Particle enum name
    particle_count: 4                 # Default: 5
    sound: minecraft:block.grass.place
  "2":
    particle: CRIMSON_SPORE
    particle_count: 10
    sound: minecraft:entity.experience_orb.pickup

item_drops:
  ripe_tomato:
    item: "pack:my_farm_pack:tomato"
    min_amount: 1
    max_amount: 3
    chance: 1.0
    trigger_min_age: 2
    trigger_max_age: -1
    food:
      nutrition: 3
      saturation: 0.5
      can_always_eat: true
      effects:
        - effect: HASTE
          duration: 120
          amplifier: 0
          chance: 0.3

  immature_seed_return:
    item: "crop_seed"
    min_amount: 1
    max_amount: 1
    chance: 1.0
    trigger_min_age: 0
    trigger_max_age: 1
Configuration Reference
| Path | Default | Exact behavior |
|---|---|---|
seed.id | <crop-id>_seed | Logical seed ID used to match this crop with pack item browsing. |
seed.material | WHEAT_SEEDS | Vanilla material used by the generated plantable seed. Invalid names fall back to wheat seeds. |
growth.max_age | Detected value | Written into generated configs, but runtime maximum age is currently detected from the highest stage file. |
growth.avg_seconds_per_stage | 240 | Controls the probability of advancing one age during each 30-second growth check. |
growth.min_light | 9 | No growth roll occurs when the crop location's light level is lower. |
placement.bottom_block | FARMLAND | The exact block material that must be right-clicked with the tagged seed. The block above must be air. |
hitbox.auto_height_step | 0.1 | Creates width 0.75 and height max(0.2, step × (age + 1)) unless an age override exists. |
hitboxes.<age>.width/height | Automatic | Overrides both dimensions of the invisible clickable Interaction entity at that exact age. |
sounds.place | Crop plant | Played after successful placement. |
sounds.break | Crop break | Played when the crop is broken or removed by an environmental break. |
sounds.interact | Crop hit | Played after a successful right-click harvest. |
sounds.grow | None | Optional sound played on every successful age change, in addition to a matching stage effect sound. |
loot.decrease_age_on_harvest | -1 | -1 removes the crop. 0 leaves it mature. A positive value subtracts that many ages, never below 0. |
loot.drop_seed_if_immature | true | Loaded by the crop definition, but the current loot manager does not act on it. Configure an explicit age-limited crop_seed drop instead. |
ready_effect | None | At maturity it produces a triple-count burst, then the normal count every 30 seconds while mature. |
stage_effects.<age> | None | Particle and/or sound fired once whenever normal scheduled growth enters that age. |
Exact Growth Calculation
Growth is checked once every 600 ticks (30 seconds). A crop can advance by at most one age per check. Crops already at maximum age are skipped.
base chance = 30 / avg_seconds_per_stage
final chance = base chance + (base chance × each active multiplier)
final chance is clamped between 0.0 and 1.0
Example: with avg_seconds_per_stage: 120, the base roll is 30 / 120 = 0.25, or 25% every 30 seconds. During ordinary rain with rain: 0.1, it becomes 0.25 + 0.025 = 0.275, or 27.5%.
rainapplies when the world has a storm and is not thundering.thunderstormapplies instead of rain while the world is thundering.max_moisturecurrently checks whether the biome name containsswamp,jungle, orforest; it does not inspect farmland moisture.snowapplies when the biome name containssnow,frozen, orice.bonemealis not currently read by planting or interaction code, so bone meal does not force or accelerate a crop.
avg_seconds_per_stage is a target average, not a guaranteed timer. A configured value of 30 or less produces a 100% base chance each check after clamping.Planting, Harvesting, and Breaking
| Player action | Result |
|---|---|
| Right-click the configured bottom block with a tagged crop seed | Plants age 0 if the block above is air. One seed is consumed unless the player is in Creative mode. |
| Right-click the crop hitbox | Rolls matching loot, fires the harvest event, drops approved items, plays the interact sound, then removes or reduces the crop according to decrease_age_on_harvest. |
| Left-click the crop | Rolls matching loot, fires the break event, plays the break sound, and always removes the crop. |
| Break or trample the supporting block | Breaks the crop and rolls its current-age loot. |
| Water or lava flows into the crop location | The fluid is allowed to flow; the crop is broken and its current-age loot is rolled. |
trigger_min_age and trigger_max_age to control exactly what can drop at each age.When WorldGuard integration is available, planting is denied where the player cannot build. Crop place, grow, harvest, break, and remove lifecycle events are also exposed to other plugins; cancellable events can stop the corresponding action, and the grow event can change the target age.
Drop Table Reference
Every child under item_drops: is an independent roll. Multiple entries can match and drop together.
| Field | Default | Exact behavior |
|---|---|---|
item | Required | Item reference to build. Invalid or unresolved references are skipped and logged. |
min_amount | 1 | Inclusive minimum. Negative values are clamped to 0. |
max_amount | 1 | Inclusive maximum. It is raised to at least min_amount. |
chance | 1.0 | Independent probability from 0.0 to 1.0, clamped to that range. |
trigger_min_age | -1 | Minimum matching age. -1 means no lower limit. |
trigger_max_age | -1 | Maximum matching age. -1 means no upper limit. |
Supported Item References
| Format | Example | Result |
|---|---|---|
| Current crop seed | crop_seed | Builds this crop's plantable, PDC-tagged seed with its assigned seed model. |
| Vanilla material | WHEAT | Creates a normal Bukkit material item. |
| CustomiZer gameplay item | customizer:blood_ingot | Loads an item by key from the CustomiZer custom item handler. |
| Pack item | pack:my_farm_pack:tomato | Builds the item ID from the named pack through the pack manager. |
Recommended Mature and Immature Drops
item_drops:
  mature_produce:
    item: "pack:my_farm_pack:tomato"
    min_amount: 1
    max_amount: 3
    chance: 1.0
    trigger_min_age: 2
    trigger_max_age: -1

  mature_seed:
    item: "crop_seed"
    min_amount: 1
    max_amount: 2
    chance: 0.7
    trigger_min_age: 2
    trigger_max_age: -1

  immature_seed:
    item: "crop_seed"
    min_amount: 1
    max_amount: 1
    chance: 1.0
    trigger_min_age: 0
    trigger_max_age: 1
Edible Crop Drops
Add food: to any loot entry to apply a Paper food component to that generated drop.
| Field | Default | Behavior |
|---|---|---|
nutrition | 2 | Food points restored by the item. |
saturation | 0.2 | Saturation value assigned to the food component. |
can_always_eat | false | Allows eating while full. It also becomes true globally when crops.can_always_eat: true is set in config.yml. |
effects[].effect | Required per effect | Bukkit potion effect name such as SPEED, HASTE, or REGENERATION. |
effects[].duration | 100 | Duration in ticks. 20 ticks = 1 second. |
effects[].amplifier | 0 | Zero-based level: 0 = level I, 1 = level II. |
effects[].chance | 1.0 | Independent chance checked when the tagged food is consumed. |
# plugins/CustomiZer/config.yml
crops:
can_always_eat: falsePersistence and Reloading
- Placed crop type, location, current age, timestamps, and planter UUID are persisted.
- Crop visuals and hitboxes are recreated after restart and when their chunk loads.
- CustomModelData allocations are stored in a registry so adding crops does not renumber existing crops.
/zcrop reloadrescans crop definitions and refreshes displays. Rebuild or resend the resource pack when adding or changing textures/models.
Crop Commands
| Command | Permission | Purpose |
|---|---|---|
/zcrop reload | customizer.crops.admin | Rescan crop packs and reload definitions. |
/zcrop give <player> <cropId> | customizer.crops.admin or customizer.crops.give | Give the correctly tagged plantable seed. |
/zcrop list | customizer.crops.admin | List registered crop IDs, pack IDs, and maximum ages. |
/zcrop info | customizer.crops.admin | Show the ID, age, pack, and location of the targeted crop within 5 blocks. |
/zcrop setage <age> | customizer.crops.admin | Set the targeted crop's age, clamped between 0 and its maximum age. |
/zcrop remove | customizer.crops.admin | Remove the targeted crop without rolling loot. |
/zcrop purge [radius] | customizer.crops.admin | Remove saved crops in a radius; default 10, clamped from 1 to 200. |
/zcrop cleanentities [radius] | customizer.crops.admin | Remove orphaned crop Interaction/ItemDisplay entities; default 20, clamped from 1 to 200. |
Creation Checklist
- Choose a lowercase crop ID such as
tomato. - Create either continuous PNG stages in
Textures/tomato/or JSON stages inModels/tomato/. - Create
configs/tomato.yml. If omitted, CustomiZer generates a basic config after detecting the visual files. - Define harvest and seed pack items if you want custom inventory textures.
- Use explicit age ranges for every mature and immature drop.
- Run
/zcrop reload, then/zcrop listto confirm registration. - Use
/zcrop give <player> tomato, plant it, and test stages with/zcrop setage <age>. - Rebuild/distribute the resource pack whenever visual assets change.
GUI System
CustomiZer has two in-game menus. They look similar but show completely different things. Read this page first — it will save you hours of confusion.
The One-Sentence Explanation
packs/<packId>/gui.yml. Clicking gives the raw item (just the texture, no special mechanics)./zitems = an admin give tool — admins browse and left-click to give fully functional items (swords with stats, pickaxes, seeds, armor, etc.) from
items/<packId>/gui.yml.Each menu reads from its own separate file.
/z gui reads packs/<packId>/gui.yml; /zitems reads items/<packId>/gui.yml.
The Most Important Thing to Understand
/z gui and /zitems now read from two separate files per pack:
packs/<packId>/gui.yml    ← raw visual items shown in /z gui (type: pack_item, raw)
items/<packId>/gui.yml   ← functional items shown in /zitems (type: sword, pickaxe, armor, etc.)
The slot: at the top of each pack's yml controls where the category icon appears in the menu. There is no longer a pack_overrides section for slot assignments.
The item's type: field determines what kind of item it is:
| type value | File it belongs in | Shows in /z gui? | Shows in /zitems? | Can be given on click? |
|---|---|---|---|---|
pack_item | packs/<packId>/gui.yml | ✅ Yes | ❌ No | ❌ No (browse only, raw texture) |
raw | packs/<packId>/gui.yml | ✅ Yes | ❌ No | ❌ No |
sword | items/<packId>/gui.yml | ❌ No | ✅ Yes | ✅ Yes |
pickaxe | items/<packId>/gui.yml | ❌ No | ✅ Yes | ✅ Yes |
harvester | items/<packId>/gui.yml | ❌ No | ✅ Yes | ✅ Yes |
armor | items/<packId>/gui.yml | ❌ No | ✅ Yes | ✅ Yes |
block | items/<packId>/gui.yml | ❌ No | ✅ Yes | ✅ Yes |
cosmetic | items/<packId>/gui.yml | ❌ No | ✅ Yes | ✅ Yes |
staff | items/<packId>/gui.yml | ❌ No | ✅ Yes | ✅ Yes |
Side-by-Side Comparison
| 🏪 /z gui | 📦 /zitems | |
|---|---|---|
| Who uses it? | All players — browse what's on the server | Admins — give functional items to themselves |
| What does it show? | Raw pack visuals — pack_item / raw type entries. Clicking gives the raw item (texture only). | Functional items — swords, pickaxes, seeds, armor, blocks, etc. Clicking gives a fully configured item. |
| Config that drives it | packs/<packId>/gui.yml | items/<packId>/gui.yml |
| Category slot config | slot: field in packs/<packId>/gui.yml | slot: field in items/<packId>/gui.yml |
| Nav buttons config | plugins/CustomiZer/gui/main_menu.yml | plugins/CustomiZer/gui/items_shop.yml |
| Browse All Items button | Opens paginated browser of all raw items — configured in gui/all_items.yml | N/A |
| Give on click? | ❌ No (raw item only) | ✅ Yes (admin only) |
Inventory Slot Reference
Both GUIs use standard Minecraft slot numbering — left to right, top to bottom, starting at 0. A 6-row inventory has 54 slots (0–53):
Row 1:  [ 0][ 1][ 2][ 3][ 4][ 5][ 6][ 7][ 8]
Row 2:  [ 9][10][11][12][13][14][15][16][17]
Row 3:  [18][19][20][21][22][23][24][25][26]
Row 4:  [27][28][29][30][31][32][33][34][35]
Row 5:  [36][37][38][39][40][41][42][43][44]
Row 6: [45][46][47][48][49][50][51][52][53] ← nav buttons row/z gui — Pack Browser
The player-facing menu. Shows raw resource pack items (custom textures and models) so players can see what's available on the server. Browse only — no items are given.
How It Works
When a player runs /z gui, they see one icon per registered pack. Clicking a pack icon opens a second page listing all items of type pack_item or raw from that pack's packs/<packId>/gui.yml. A "Browse All Items" button also lets players see all raw items from all packs on one paginated page.
/z gui do NOT come from packs/*/configs/. They come from packs/<packId>/gui.yml — a dedicated display browser file separate from the /zitems file. The resource pack's packs/ folder holds textures and item definitions; the GUI display file lives at the plugin root level under packs/<packId>/gui.yml.Config 1 — Shell layout: plugins/CustomiZer/gui/main_menu.yml
Controls the outer frame of the /z gui category browser: title, size, background filler, border, and the "Browse All Items" button. The Prev/Back/Next navigation buttons when browsing items inside a pack are also configured here.
# plugins/CustomiZer/gui/main_menu.yml

categories:
  title: "<white><shift:-8><font_image:CustomiZerInternal:1>"
  size: 6
  background:
    enabled: true
    material: PAPER
    model_data: 29999
    name: " "
  border:
    enabled: true
    material: PAPER
    model_data: 29999
    name: " "

pack_gui:
  prev_button:
    slot: 47
    material: PAPER
    model_data: 29999
    name: "&c◀ Previous"
  back_button:
    slot: 49
    material: PAPER
    model_data: 29999
    name: "&c✖ Back"
  next_button:
    slot: 51
    material: PAPER
    model_data: 29999
    name: "&aNext ▶"
  page_info:
    enabled: true
    slot: 48
    material: PAPER
    model_data: 29999
    name: "&7Page &f%page% &7/ &f%total%"
The "Browse All Items" button (new) opens a paginated browser showing ALL raw items from ALL packs. It is configured in plugins/CustomiZer/gui/all_items.yml.
Config 2 — Pack display items: packs/<packId>/gui.yml
This is the file you create to make a pack appear in /z gui. It contains the raw visual items (type: pack_item or type: raw) displayed in the browser. The plugin automatically scans for these files. No other registration needed.
For /zitems, create a separate file at items/<packId>/gui.yml with functional item types (sword, pickaxe, armor, etc.).
Changing a pack's slot in /z gui
Edit the slot: at the top of the pack's packs/<packId>/gui.yml. That number controls where the pack's icon sits in the /z gui category grid. If no packs/ file exists for a pack, the slot is read from items/<packId>/gui.yml instead.
# packs/my_gem_pack/gui.yml  ← display browser for /z gui

name: "<gradient:#ffd700:#ff9a3c><bold>Gem Pack</bold></gradient>"
slot: 11    # ← Change this to move the icon in /z gui

icon:
  pack: my_gem_pack   # pack namespace
  id: ruby            # item id used as the icon

gui:
  size: 6

# Only pack_item / raw types appear in /z gui
items:
  - type: pack_item
    pack: my_gem_pack
    id: ruby
    name: "&cRuby"
    lore:
      - "&7A precious red gem"

  - type: pack_item
    pack: my_gem_pack
    id: emerald_gem
    name: "&aEmerald Gem"
    lore:
- "&7A brilliant green gem"Row 2: 11 12 13 14 15 | Row 3: 20 21 22 23 24 | Row 4: 29 30 31 32 33 | Row 5: 38 39 40 41 42
Avoid rows 1 and 6 (border/nav area).
Adding a Pack to /z gui (summary)
- Create
packs/my_pack/gui.ymlwith a freeslot:andpack_itementries - Run
/zpack reloadpacksin-game
That's it. No other file needs to be touched for the pack to appear in /z gui.
/zitems — Functional Items Browser
The admin tool for browsing and giving functional items — swords with levelling, pickaxes, cosmetics, harvesters, and more. Left-click any item to receive it instantly.
The /zitems main menu — each icon is a registered pack. Click a pack to browse its functional items.
/zitems and /z gui now read from separate files. /zitems reads items/<packId>/gui.yml and only shows functional item types (sword, pickaxe, armor, etc.). /z gui reads packs/<packId>/gui.yml and shows raw visuals (pack_item, raw). If you see an item in /z gui but not /zitems, you need to add it to items/<packId>/gui.yml with a functional type.Config 1 — Nav buttons: plugins/CustomiZer/gui/items_shop.yml
This file controls the Prev / Back / Next navigation buttons and page info shown when browsing items inside a category. It does not control which packs appear as categories — that comes from each pack's items/<packId>/gui.yml.
# plugins/CustomiZer/gui/items_shop.yml

pack_gui:
  prev_button:
    slot: 47
    material: PAPER
    model_data: 29999
    name: "&c◀ Previous"
  back_button:
    slot: 49
    material: PAPER
    model_data: 29999
    name: "&c✖ Back"
  next_button:
    slot: 51
    material: PAPER
    model_data: 29999
    name: "&aNext ▶"
  page_info:
    enabled: true
    slot: 48
    material: PAPER
    model_data: 29999
    name: "&7Page &f%page% &7/ &f%total%"
Config 2 — Pack functional items: items/<packId>/gui.yml
This is the file that registers functional items in /zitems. It is a separate file from the packs/<packId>/gui.yml used by /z gui. You need both files if you want a pack to appear in both menus.
Changing a category's slot in /zitems
Edit slot: at the top of items/<packId>/gui.yml. This controls the pack icon position in /zitems. The equivalent packs/<packId>/gui.yml controls the slot in /z gui independently.
Controlling item placement inside a category
Each item entry in items/<packId>/gui.yml supports an optional slot: field that pins it to a specific position:
# items/my_pack/gui.yml  ← functional items for /zitems

name: "<gradient:#5cc8ff:#7ee787><bold>My Pack</bold></gradient>"
slot: 11
icon:
  pack: my_pack
  id: silver_sword
gui:
  size: 6

items:
  # Functional items → appear in /zitems (clicking gives the fully configured item)
  - type: sword
    id: silver_sword
    slot: 11          # ← pin to exact slot inside the /zitems category page
    name: "&7⚔ Silver Sword"
    lore:
      - "&7A levelling sword"
      - "&aLeft-click to receive"

  - type: pickaxe
    id: silver_pickaxe
    slot: 12          # ← pin to slot 12
    name: "&7⛏ Silver Pickaxe"
    lore:
      - "&7Radius mining pickaxe"

  - type: harvester
    id: silver_hoe
    # no slot: → placed automatically after the pinned items
For the display browser (/z gui), create a separate packs/my_pack/gui.yml with type: pack_item entries for the same items.
• If
slot: is set → item is placed at that exact slot• If no
slot: → placed automatically left-to-right after already-pinned items• If the pack has more items than fit one page → all
slot: values are ignored and items paginate sequentially (the last row becomes Prev/Back/Next buttons)
Item Types Reference
| type | Shows in | Gives on click | Configured in |
|---|---|---|---|
pack_item | /z gui only | ❌ | packs/<pack>/configs/*.yml |
raw | /z gui only | ❌ | packs/<pack>/configs/*.yml |
sword | /zitems only | ✅ | CustomiZe!/<pack>/swords.yml |
pickaxe | /zitems only | ✅ | CustomiZe!/<pack>/pickaxes.yml |
harvester | /zitems only | ✅ | CustomiZe!/<pack>/harvesterhoes.yml |
armor | /zitems only | ✅ | CustomiZe!/<pack>/armors.yml |
block | /zitems only | ✅ | CustomiZe!/<pack>/blocks.yml |
cosmetic | /zitems only | ✅ | CustomiZe!/<pack>/cosmetics.yml |
staff | /zitems only | ✅ | CustomiZe!/<pack>/staves.yml |
Converting ItemsAdder Packs Automatically
If you have ItemsAdder content packs you want to move to CustomiZer, the built-in converter handles it automatically — it creates the gui.yml, copies assets, and classifies items.
- Drop the ItemsAdder content folder (must contain
configs/andresourcepack/) into:
plugins/CustomiZer/converters/itemsadder/input/<packName>/ - Run in-game:
/zpack convert itemsadder <packName> - Run
/zpack zipto rebuild the resource pack
pack_item in /z gui. Cosmetics, swords, and staves also get functional yml files so they appear in /zitems.Pack GUI — gui.yml Reference
Two separate files per pack: one for the /z gui display browser, one for the /zitems admin give tool. Each file controls which slot the pack occupies, what icon it shows, and which items appear inside it.
Where the files live
packs/<packId>/gui.yml    ← display browser for /z gui (type: pack_item, raw)
items/<packId>/gui.yml   ← admin give tool for /zitems (type: sword, pickaxe, armor, etc.)
The plugin automatically detects these files. No other registration is needed — just create the file and reload. The slot: at the top of each file controls where the category icon appears. If only one file exists for a pack, its slot: is used for both menus.
packs/<packId>/gui.yml — display browser (/z gui)
# packs/my_pack/gui.yml  ← raw visual items shown in /z gui

# Display name shown as the pack's label in /z gui.
name: "<gradient:#5cc8ff:#7ee787><bold>My Pack</bold></gradient>"

# Slot in the /z gui category grid.
# Use slots 11–15, 20–24, 29–33, or 38–42 for best results.
slot: 11

# The icon shown for this pack in the /z gui category grid.
icon:
  pack: my_pack     # pack namespace
  id: silver_ore    # item id within that pack

# The title and size of the pack's browsing page.
gui:
  title: "<white><shift:-8><font_image:CustomiZerInternal:1>"
  size: 6   # rows (1–6); last row = nav buttons if size > 1

# Only pack_item / raw types belong here
items:

  # Raw visual item — shows in /z gui (clicking gives the raw item)
  - type: pack_item
    pack: my_pack
    id: silver_ore
    name: "&7Silver Ore"
    lore:
      - "&7A raw ore texture"
    # slot: 0    ← optional: pin to exact position
items/<packId>/gui.yml — admin give tool (/zitems)
# items/my_pack/gui.yml  ← functional items shown in /zitems

name: "<gradient:#5cc8ff:#7ee787><bold>My Pack</bold></gradient>"
slot: 11

icon:
  pack: my_pack
  id: silver_ore

gui:
  size: 6

# Functional item types belong here
items:

  # Functional sword — shows in /zitems
  - type: sword
    id: silver_sword
    slot: 11      # optional: pin to slot 11 in the /zitems category page
    name: "&7⚔ Silver Sword"
    lore:
      - "&7A levelling sword"
      - "&aLeft-click to receive"

  # Functional pickaxe — shows in /zitems
  - type: pickaxe
    id: silver_pickaxe
    slot: 12
    name: "&7⛏ Silver Pickaxe"

  # Functional harvester hoe — shows in /zitems
  - type: harvester
    id: silver_hoe
    name: "&7🌾 Silver Hoe"

  # Functional cosmetic hat — shows in /zitems
  - type: cosmetic
    id: silver_crown
    name: "&7👑 Silver Crown"
Common Mistakes & Fixes
| Problem | Cause | Fix |
|---|---|---|
| Pack doesn't appear in either GUI | No packs/<packId>/gui.yml or items/<packId>/gui.yml, or plugin not reloaded | Create the appropriate file(s); run /zpack reloadpacks |
| Pack icon is in the wrong slot | slot: at top of the gui.yml conflicts with another pack | Change slot: to a free number (11–42 range) |
| Item appears in /z gui but not /zitems | Item type is pack_item or raw, or it's not in items/<packId>/gui.yml | Add it to items/<packId>/gui.yml with a functional type (sword, cosmetic, etc.) |
| Item appears in /zitems but not /z gui | No pack_item entry in packs/<packId>/gui.yml | Add a pack_item entry in packs/<packId>/gui.yml for the same item id |
| Item slot: is ignored / items overlap | Pack has more items than fit one page → pagination overrides slot: values | Reduce item count to fit one page, or remove slot: and let items paginate automatically |
| Functional sword shows but does nothing | id: in gui.yml doesn't match the key in swords.yml | Make sure both files use the exact same id string |
Mastery System
Persistent XP tracks that reward players for mining, combat, farming, and exploration with milestone rewards.
plugins/CustomiZer/mastery.ymlWhat Is Mastery?
Mastery tracks give players a long-term progression goal separate from levelling. Breaking ore gives Mining Mastery XP. Killing mobs gives Combat Mastery XP. Reaching milestones (level 10, 25, 50, 100) triggers reward commands and messages.
max_level: 100     # Maximum mastery level for all tracks

tracks:
  mining:
    display: "⛏ Mining Mastery"

    # XP earned per block broken
    xp_per_block:
      COAL_ORE: 3
      IRON_ORE: 5
      GOLD_ORE: 7
      DIAMOND_ORE: 15
      ANCIENT_DEBRIS: 40
      DEEPSLATE_COAL_ORE: 4
      my_pack:ruby_ore: 12       # Custom pack blocks use namespace:key

    xp_per_level: 1000           # XP needed per level (same for all levels)

    milestones:
      10:
        message: "⛏ Mining Mastery 10 reached!"
        commands:
          - "give {player} diamond 5"
      25:
        message: "⛏ Mining Mastery 25! You're a real miner."
      50:
        message: "⛏ Mining Mastery 50!"
        commands:
          - "cxp give {player} item prestige_token 1"
      100:
        message: "⛏ MINING MASTER! Maximum level achieved!"
        commands:
          - "cxp give {player} item elite_pickaxe 1"

  combat:
    display: "⚔ Combat Mastery"
    xp_per_kill:
      ZOMBIE: 3
      SKELETON: 4
      SPIDER: 3
      CREEPER: 6
      ENDER_DRAGON: 200
      WITHER: 100
    xp_per_level: 1500

  farming:
    display: "🌿 Farming Mastery"
    xp_per_harvest:
      WHEAT: 2
      CARROTS: 2
      POTATOES: 2
      PUMPKIN: 5
    xp_per_level: 800
Commands
| Command | Description |
|---|---|
/zmastery | View your own mastery levels |
/zmastery <player> | View another player's mastery |
Missions
Daily and weekly objectives that reset on a schedule and reward players with money and items.
plugins/CustomiZer/missions.ymldaily_reset_hour: 0 # Hour of day to reset daily missions (0 = midnight)
weekly_reset_day: MONDAY # Day of week to reset weekly missions
daily:
mine_iron:
display: "⛏ Iron Miner"
description: "Mine 30 Iron Ore"
objective: MINE_BLOCK # Objective type (see table below)
target: IRON_ORE # What to mine/kill/harvest
amount: 30 # How many needed to complete
rewards:
money: 200
commands:
- "cxp give {player} item mission_token 2"
message: "Daily Complete: Iron Miner! +$200"
kill_zombies:
display: "⚔ Zombie Slayer"
description: "Kill 25 Zombies"
objective: KILL_MOB
target: ZOMBIE
amount: 25
rewards:
money: 150
weekly:
nether_run:
display: "🔥 Nether Runner"
description: "Mine 5 Ancient Debris this week"
objective: MINE_BLOCK
target: ANCIENT_DEBRIS
amount: 5
rewards:
money: 2000
commands:
- "cxp give {player} item mission_token 10" Objective Types
| Objective | target examples | Notes |
|---|---|---|
MINE_BLOCK | IRON_ORE, COAL_ORE | Any vanilla block material |
MINE_CUSTOM_BLOCK | my_pack:ruby_ore | A custom pack block |
MINE_BLOCK_WITH_TOOL | STONE | Also add tool: pickaxe_key |
KILL_MOB | ZOMBIE, ENDER_DRAGON, ANY_HOSTILE | EntityType or ANY_HOSTILE |
HARVEST_CROP | WHEAT, ANY_CROP | Material or ANY_CROP |
EAT_ITEM | item key from items.yml | CustomiZer food item |
USE_ITEM | item key from items.yml | CustomiZer usable item |
Prestige
Max out your mastery tracks to prestige — earning permanent reward multiplier bonuses that stack.
plugins/CustomiZer/prestige.ymlmax_prestige: 10
# Which mastery tracks must be at max level to prestige
mastery_tracks_required:
- mining
- combat
mastery_level_required: 100 # All listed tracks must reach this level
levels:
1:
display: "✦ Prestige I"
permanent_bonus_percent: 2 # +2% to all XP and rewards, permanently
rewards:
money: 5000
commands:
- "cxp give {player} item prestige_token 2"
message: "★ Prestige I achieved! +2% permanent bonus!"
2:
display: "✦ Prestige II"
permanent_bonus_percent: 4
rewards:
money: 8000
10:
display: "✦ ASCENDANT"
permanent_bonus_percent: 20
rewards:
money: 100000
commands:
- "cxp give {player} sword celestial_blade" Reforge
Re-roll stat modifiers on weapons and armor using reforge stones.
plugins/CustomiZer/reforge.ymlreforge_cost_item: "reforge_stone" # CustomiZer item key consumed each reforge
reforge_cost_amount: 3 # How many stones consumed
reforge_cost_money: 250.0 # Money cost (in addition to items)
use_money_cost: true
modifiers:
savage:
display: "Savage"
stats:
GENERIC_ATTACK_DAMAGE: 2.0
GENERIC_ATTACK_SPEED: 0.1
lore_line: "✦ Savage: +2 ATK, +0.1 SPD"
weight: 20 # Higher weight = more commonly rolled
ancient:
display: "Ancient"
stats:
GENERIC_MAX_HEALTH: 4.0
GENERIC_ARMOR: 1.0
lore_line: "✦ Ancient: +4 HP, +1 Armor"
weight: 15
celestial:
display: "Celestial"
stats:
GENERIC_ATTACK_DAMAGE: 4.0
GENERIC_MAX_HEALTH: 6.0
GENERIC_ARMOR: 2.0
weight: 2 # Rare modifier
void:
display: "Void"
stats:
GENERIC_ATTACK_DAMAGE: 6.0
GENERIC_ATTACK_SPEED: 0.3
weight: 1 # Very rare modifier Repair
Restore custom durability on swords and tools with rank-based discounts and cooldowns.
plugins/CustomiZer/repair.ymlrepair-rate-per-10%: 1000 # Base cost (money) to restore 10% durability
# Cost per 10% durability for swords, per rarity tier
swords-repair-rate-per-10%:
common: 1000
rare: 2000
epic: 3000
legendary: 4000
mythic: 5000
# Different cooldowns and discounts per player rank
# Rank is determined by LuckPerms group name
general-cooldown-per-rank:
Default:
Cooldown: 10000 # Milliseconds between repairs (10000 = 10 seconds)
Discount: 0 # Percent discount on cost
VIP:
Cooldown: 5000
Discount: 10
MVP:
Cooldown: 3000
Discount: 15
ELITE:
Cooldown: 2000
Discount: 20
messages:
no-money: "&cNot enough money."
repaired-successfully: "&aRepaired {count} items for &6${cost}&a."
no-items-to-repair: "&eNo items need repairs."
cooldown-message: "&cWait {time} seconds before repairing again."This page has moved. Click here for the Levelling System page.
The Levelling System
CustomiZer supports kill-based levelling for swords and axes, and block-based levelling for pickaxes. Both are optional add-ons to normal weapons and tools.
Overview — Two Types of Levelling
| Item Type | What Triggers a Level-Up | Config File |
|---|---|---|
| Swords & Axes | Player kills mobs with the weapon | swords.yml / axes.yml + rarity.yml |
| Pickaxes | Player mines blocks with the pickaxe | pickaxes.yml (self-contained) |
Sword & Axe Rarity (Kill-Based)
Swords and axes can have a rarity: block in their config. The plugin tracks kills in item NBT data. When the kill count hits the configured threshold, the weapon upgrades to the next tier automatically — no commands needed.
Common → Rare → Epic → Legendary → Mythical
What happens when a sword/axe upgrades:
- The Custom Model Data changes to the next tier's value → Minecraft loads a different texture from the resource pack
- The item's display name changes to the tier's name
- A Buff% multiplier is applied to all attributes (so a Legendary sword is stronger than a Common one)
- The player receives an upgrade notification
Step 1 — Define a texture per tier in your pack
Each rarity tier needs its own pack item entry with a unique model_id pointing to a different texture file:
# packs/my_pack/configs/items.yml
items:
  dragon_blade_common:
    resource:
      generate: true
      material: IRON_SWORD
      model_id: 32001           # CMD for Common tier
      textures: [weapons/dragon_blade_common.png]

  dragon_blade_rare:
    resource:
      generate: true
      material: IRON_SWORD
      model_id: 32002           # CMD for Rare tier — different PNG!
      textures: [weapons/dragon_blade_rare.png]

  dragon_blade_epic:
    resource:
      generate: true
      material: IRON_SWORD
      model_id: 32003
      textures: [weapons/dragon_blade_epic.png]

  dragon_blade_legendary:
    resource:
      generate: true
      material: IRON_SWORD
      model_id: 32004
      textures: [weapons/dragon_blade_legendary.png]

  dragon_blade_mythical:
    resource:
      generate: true
      material: IRON_SWORD
      model_id: 32005
      textures: [weapons/dragon_blade_mythical.png]
Step 2 — Add the rarity block to your sword
Point each rarity tier to the correct CMD:
# CustomiZe!/__global__/swords.yml
swords:
  dragon_blade:
    type: IRON_SWORD
    display_name: "&4Dragon Blade"
    durability: 5000
    attributes:
      GENERIC_ATTACK_DAMAGE: 10.0

    lore:
      - "&8Rarity: %rarity%"
      - "&8Kills: %progress% / %required%"

    # The rarity block — remove this entirely if you don't want levelling
    rarity:
      common:
        custom_model_data: 32001    # Matches dragon_blade_common model_id
        name: "&7Common Dragon Blade"
      rare:
        custom_model_data: 32002
        name: "&9Rare Dragon Blade"
      epic:
        custom_model_data: 32003
        name: "&5Epic Dragon Blade"
      legendary:
        custom_model_data: 32004
        name: "&6Legendary Dragon Blade"
      mythical:
        custom_model_data: 32005
        name: "&dMythical Dragon Blade"
Step 3 — Configure rarity.yml
plugins/CustomiZer/rarity.yml is the global rarity chain. Every sword and axe on the server shares this file — it defines the tier names, kill thresholds, and stat buffs. Your per-sword rarity: block in swords.yml only controls the CMD (texture) and display name per tier; the actual upgrade logic lives here.
rarity.yml — All Config Keys
| Key | Type | Required? | Description |
|---|---|---|---|
Name | String | Required | Display name for this rarity tier. Supports & color codes (e.g. &6Legendary). Shown via the %rarity% lore placeholder. |
Buff | Int | Required | Percentage stat multiplier applied to all sword attributes when the item reaches this tier. Formula: final_value = configured_value × (1 + Buff ÷ 100). Set to 0 for no buff. |
EvolutionKillsRequired | Int | Required | Number of kills needed at this tier to advance to the next one. The counter resets to 0 after each upgrade — it is per-tier, not cumulative. Set to 0 on your final tier (though NextRarity: null already stops upgrades). |
NextRarity | String or null | Required | The rarity ID to upgrade to when the kill count is met. Must match the YAML key of another entry in rarities:. Set to null (no quotes) to mark this as the final tier — no further upgrades will occur. |
Model_data is also parsed from this file but is not used for texture changes. Textures are controlled by custom_model_data inside the sword's own rarity: block in swords.yml. You can safely ignore Model_data in rarity.yml.How the Buff Works Exactly
When a sword upgrades to a new tier, the plugin reads all attribute values from the sword's attributes: config block and reapplies them with the tier's Buff multiplier:
# Sword config:
attributes:
  GENERIC_ATTACK_DAMAGE: 10.0
  GENERIC_ATTACK_SPEED: 1.6

# At Rare (Buff: 10):
#   attack_damage = 10.0 × (1 + 10/100) = 11.0
#   attack_speed  = 1.6  × (1 + 10/100) = 1.76

# At Epic (Buff: 20):
#   attack_damage = 10.0 × (1 + 20/100) = 12.0
#   attack_speed  = 1.6  × (1 + 20/100) = 1.92

# At Legendary (Buff: 30):
#   attack_damage = 10.0 × 1.30 = 13.0

# At Mythic (Buff: 40):
# attack_damage = 10.0 × 1.40 = 14.0How the Kill Counter Works
- The counter tracks kills per tier. After an upgrade it resets to 0.
- A separate total kills counter tracks all-time kills with the weapon and is never reset — this is what
%total_kills%shows in lore. - At the final tier (
NextRarity: null), the evolution counter is frozen. Total kills continue to increment. - The upgrade fires the instant a kill pushes the counter to or past
EvolutionKillsRequired.
You Can Create Completely Custom Tier Chains
The rarity system is not limited to the five default tiers. You can create any number of tiers with any names. The YAML key is the tier's internal ID — it must match what you write in NextRarity and in your sword's rarity: block.
Example — 3-tier custom chain
# rarity.yml — a totally custom 3-tier chain
rarities:
  bronze:
    Name: "&6Bronze"
    Buff: 0
    EvolutionKillsRequired: 25
    NextRarity: "silver"

  silver:
    Name: "&fSilver"
    Buff: 15
    EvolutionKillsRequired: 75
    NextRarity: "gold"

  gold:
    Name: "&e&lGold"
    Buff: 35
    EvolutionKillsRequired: 0    # Irrelevant — NextRarity is null
    NextRarity: null              # Max tier
Then in your sword's config, your rarity: block uses those same IDs:
rarity:
  bronze:
    custom_model_data: 50001
    name: "&6Bronze Blade"
  silver:
    custom_model_data: 50002
    name: "&fSilver Blade"
  gold:
    custom_model_data: 50003
    name: "&e&lGolden Blade"
Example — 7-tier progression for a long-term server
rarities:
  novice:
    Name: "&7Novice"
    Buff: 0
    EvolutionKillsRequired: 50
    NextRarity: "apprentice"

  apprentice:
    Name: "&aApprentice"
    Buff: 8
    EvolutionKillsRequired: 150
    NextRarity: "adept"

  adept:
    Name: "&2Adept"
    Buff: 16
    EvolutionKillsRequired: 300
    NextRarity: "expert"

  expert:
    Name: "&bExpert"
    Buff: 25
    EvolutionKillsRequired: 500
    NextRarity: "master"

  master:
    Name: "&9Master"
    Buff: 35
    EvolutionKillsRequired: 750
    NextRarity: "grandmaster"

  grandmaster:
    Name: "&5Grandmaster"
    Buff: 45
    EvolutionKillsRequired: 1000
    NextRarity: "legend"

  legend:
    Name: "&6&lLEGEND"
    Buff: 60
    EvolutionKillsRequired: 0
NextRarity: nullImportant — rarity.yml vs swords.yml rarity block
| Configured in | Controls |
|---|---|
rarity.yml | Tier names (Name), stat buff multipliers (Buff), kill thresholds (EvolutionKillsRequired), upgrade chain (NextRarity). Global for all swords. |
swords.yml → rarity: block | Which texture (CMD) to use per tier, and the display name override per tier. Per-sword. |
The tier IDs (e.g. common, rare, bronze) must be identical in both files — the name in rarity.yml's rarities: map must match the name in the sword's rarity: block.
Sword Lore Placeholders (with rarity)
| Placeholder | Replaced with |
|---|---|
%rarity% | Current tier's Name value from rarity.yml (with color codes applied) |
%progress% | Kills toward the next upgrade (resets after each upgrade) |
%required% | Kills needed to reach the next tier (EvolutionKillsRequired) |
%total_kills% | All-time lifetime kills with this specific item (never resets) |
%custom_durability% | Current durability |
%max_custom_durability% | Max durability at this rarity tier |
Pickaxe Levelling (Block-Based)
Pickaxes use a completely self-contained levelling system defined inside pickaxes.yml — there is no separate rarity.yml involved. Each pickaxe definition contains a levels: map. The plugin counts blocks mined and upgrades when the threshold is met.
What happens when a pickaxe levels up:
- Custom Model Data changes → new texture
- Mining radius expands (e.g. 1×1 → 3×3 → 3×7)
- Haste level can increase per tier
- Custom durability increases
- The player is notified
# CustomiZe!/__global__/pickaxes.yml
pickaxes:
  tier_pickaxe:
    type: DIAMOND_PICKAXE
    display_name: "⛏ Tier Pickaxe"
    lore:
      - "Level: %level% / %max_level%"
      - "Blocks mined: %blocks_mined% / %blocks_required%"
      - "Mining area: %radius%×%radius%"
      - "%bonuses%"

    levels:
      1:
        name: "⛏ Tier Pickaxe [Lvl. 1]"
        custom_model_data: 30041        # Texture for level 1
        durability: 2000
        radius: 1                       # Mines 1×1 (just the single block)
        height_radius: 0
        effect_on_hold: haste
        effect_amplifier: 0             # Haste I
        blocks_required: 200            # Mine 200 blocks → level 2
        bonus:
          - "• Haste I while held"

      2:
        name: "⛏ Tier Pickaxe [Lvl. 2]"
        custom_model_data: 30042        # Different texture
        durability: 4000
        radius: 1
        height_radius: 1               # Now mines 1×3 tall
        effect_on_hold: haste
        effect_amplifier: 0
        blocks_required: 500
        bonus:
          - "• Haste I"
          - "• 1×3 column mining"

      3:
        name: "⛏ Tier Pickaxe [Lvl. 3]"
        custom_model_data: 30043
        durability: 7000
        radius: 3                       # 3×3 area!
        height_radius: 1
        effect_on_hold: haste
        effect_amplifier: 1             # Haste II
        blocks_required: 1000
        bonus:
          - "• Haste II"
          - "• 3×3 area mining"

      4:
        name: "⛏ Tier Pickaxe [MAX]"
        custom_model_data: 30044
        durability: 12000
        radius: 3
        height_radius: 3               # 3×7 area
        effect_on_hold: haste
        effect_amplifier: 1
        blocks_required: 0             # 0 = this is the max level
        bonus:
          - "• Haste II"
          - "• 3×7 area mining"
- "• MAX LEVEL"blocks_required: 0 on the last level entry. The plugin treats 0 as "no further upgrade" — it's the max level indicator.Pickaxe Lore Placeholders
| Placeholder | Shows |
|---|---|
%level% | Current level number |
%max_level% | Highest defined level |
%blocks_mined% | Blocks mined with this pickaxe |
%blocks_required% | Blocks needed for next level (0 at max) |
%current_durability% | Remaining custom durability |
%max_durability% | Max durability at current level |
%radius% | Current mining area side (e.g. 3 = 3×3) |
%height_radius% | Vertical mining radius |
%bonuses% | All bonus lines for current level |
Ore Generators
Automatically inject custom blocks into world generation — no external world editor needed.
plugins/CustomiZer/generators.ymlWhat This Does
When a chunk is loaded for the first time (or generated fresh), CustomiZer places your custom ores into it — just like how Minecraft naturally generates diamond ore veins. Players mine them just like vanilla ores.
Configuration
worlds_populators:
  # A unique key for this generator entry
  ruby_ore_overworld:
    block: my_pack:ruby_ore      # The block to place ("namespace:key" or "minecraft:stone")
    worlds:
      - world                     # Overworld
      - world_caves               # Cave world if you have one
    replaceable_blocks:           # Only replaces these blocks when placing
      - STONE
      - ANDESITE
      - GRANITE
      - TUFF
    biomes:                       # Empty list = spawn in ALL biomes
      - PLAINS
      - FOREST
      - JUNGLE
      - MOUNTAINS
    chance: 60.0                  # Percent chance of spawning a vein per chunk (0–100)
    amount: 5                     # Number of ore veins per chunk
    min_height: 15                # Minimum Y level to spawn at
    max_height: 55                # Maximum Y level to spawn at

  deepslate_ruby_ore:
    block: my_pack:deepslate_ruby_ore
    worlds:
      - world
    replaceable_blocks:
      - DEEPSLATE
      - COBBLED_DEEPSLATE
    biomes: []                    # Empty = any biome
    chance: 35.0
    amount: 3
    min_height: -60
    max_height: 0                 # Only in deepslate level
Tips
- Already-generated chunks are NOT retroactively populated. New ore configs only affect chunks generated after the config was applied.
- To force-populate existing chunks use
/zworld generate <world>(admin command). - Use a low chance and small amount for rare ores. A chance of 100 with amount 10 would make them very common.
- The
replaceable_blockslist prevents ores from floating in air or water — always include the natural blocks for that layer.
Commands
| Command | Permission | Description |
|---|---|---|
/zworld reload | cxp.admin | Reload generator config without restarting |
/zworld generate <world> | cxp.admin | Force-populate all loaded chunks in a world |
Custom Crafting Tables
Custom workbench blocks or furniture with configurable slot layouts, permissions, and recipe storage. Create and delete tables entirely in-game — no config editing required.
plugins/CustomiZer/custom_crafting_tables.yml — or use /zcraft newtable to create tables from a GUI wizard without touching the file.custom_crafting_tables:
enabled: true
storage:
type: "sqlite" # "sqlite" (file-based) or "mongodb"
sqlite:
file: "custom_crafting_recipes.db"
table: "custom_crafting_recipes"
default_table: "basic_workbench"
tables:
basic_workbench:
enabled: true
display_name: "&aBasic Workbench"
# Open this GUI when a player right-clicks this custom block
assigned_block: "my_pack:workbench_block"
# OR open when a player right-clicks this placed furniture (can use both at once)
assigned_furniture: "my_pack:workbench_item"
permission:
required: false
node: "customizer.craftingtable.basic_workbench"
gui:
title: "&8⚒ Basic Workbench"
rows: 5
# Slots where players put input items
input_slots: [10, 11, 12, 19, 20, 21, 28, 29, 30]
# Slots where the output appears
output_slots: [24]
behavior:
return_items_on_close: true # Return inputs if GUI is closed without crafting
consume_inputs: true # Remove input items when crafting
allow_partial_outputs: falseTable management
| Command | Description |
|---|---|
/zcraft newtable | Open the in-game wizard to create a new crafting table — set ID, title, rows, triggers, and paint input/output slots. Saves to config and hot-reloads instantly. |
/zcraft deletetable <tableId> | Delete a table definition from config and hot-reload. Saved recipes for that table are kept in the database. |
/zcraft tables | List all currently loaded table definitions. |
/zcraft reload | Reload table definitions and recipes from disk without restarting. |
Adding recipes to a table
Each table has its own independent recipe list. Recipes are added per-table using the table's ID — the same ID you set in the wizard or in the config.
vanilla table is a special reserved table whose recipes fire in the real Minecraft workbench — the one players open by right-clicking any normal crafting table in the world. Add recipes to it with /zcraft create vanilla <name> and they work in every vanilla workbench on the server, with no custom block or furniture required.basic_workbench is just an example custom table in the default config — it is not the vanilla crafting table. It only opens when a player right-clicks the specific custom block/furniture you assign to it.- Run
/zcraft create <tableId> <recipeName>— e.g./zcraft create my_forge iron_to_steel.
This opens the recipe designer pre-loaded with that table's exact slot layout. - Place ingredients in the blue input slots in the arrangement you want.
- Place the result item in the red output slot.
- Optionally toggle Shaped / Shapeless mode or add a permission node using the control buttons in the bottom row.
- Close the GUI — the recipe saves automatically and is live immediately. No reload needed.
To edit an existing recipe, run the same /zcraft create <tableId> <recipeName> command again — it loads the current ingredients so you can change them.
Recipe commands
| Command | Description |
|---|---|
/zcraft open [tableId] | Open a crafting table GUI by name (no physical block needed). |
/zcraft create <tableId> <name> | Open the recipe designer for a new or existing recipe on the given table. |
/zcraft delete <tableId> <name> | Delete a saved recipe by table and recipe name. |
/zcraft list [tableId] | List all saved recipes, optionally filtered to one table. |
/zcraft browse [tableId] | Open the recipe browser GUI, optionally filtered to one table. |
→ Full documentation: Custom Crafting module page
Commands
Every command available in CustomiZer.
Player Commands
| Command | Permission | What it does |
|---|---|---|
/z gui | cxp.gui | Open the main category browser GUI |
/zitems | cxp.items | Browse all packs and their items |
/z get <name> | cxp.use | Give yourself an item by its key |
/zrepair | cxp.repair | Repair custom durability on held items |
/zmastery | cxp.mastery | View your mastery progress |
/zmastery <player> | cxp.mastery | View another player's mastery |
/zmissions | cxp.missions | Open your daily/weekly mission board |
/zprestige | cxp.prestige | Open the prestige interface |
/zreforge | cxp.reforge | Open the reforge GUI |
/zsocket info | cxp.socket | View gem socket info on held item |
/zcraft | cxp.craft | Open custom crafting |
/backpack | — | Open the backpack held in offhand or worn on chestplate |
/zcrop | — | Crop-related player commands |
Admin Commands
| Command | Permission | What it does |
|---|---|---|
/z reload | cxp.reload | Reload all configs and rebuild the resource pack |
/z give <player> <name> | cxp.give | Give any player a configured item |
/z info <name> | cxp.admin | Show debug info about an item |
/zsocket add <gem> | cxp.socket.add | Add a socket to the held item |
/zsocket extract | cxp.socket.add | Remove a socketed gem |
/zworld reload | cxp.admin | Reload generator configuration |
/zworld generate <world> | cxp.admin | Force-populate chunks with new ores |
/zcrop reload | customizer.crops.admin | Reload crop definitions |
/zcrop give <player> <cropId> | customizer.crops.admin or customizer.crops.give | Give a tagged, plantable crop seed item |
/zcraft newtable | cxp.craft.admin | Open the in-game table creation wizard |
/zcraft deletetable <tableId> | cxp.craft.admin | Delete a table definition from config and hot-reload |
/zcraft open [table] | cxp.craft | Open a custom crafting table by name |
/zcraft create <table> <name> | cxp.craft.admin | Open the recipe designer for a new or existing recipe |
/zcraft delete <table> <name> | cxp.craft.admin | Delete a saved recipe |
/zcraft list [table] | cxp.craft.admin | List all saved crafting recipes |
/zcraft reload | cxp.craft.admin | Reload tables and recipes from disk |
/zpack Commands (Glyph & Pack Management)
The /zpack command group is the main toolkit for managing the resource pack from in-game. All subcommands require cxp.admin.
| Command | What it does |
|---|---|
/zpack reloadpacks | Scan all packs and re-register model IDs without rebuilding the ZIP |
/zpack zip | Build the resource pack ZIP and push it to all online players |
/zpack link | Print a clickable URL to the hosted Java resource pack |
/zpack geyser | Build the Bedrock resource pack + Geyser mappings into geyser_output/ — see Bedrock guide |
/zpack bedrock gui <name> … | Adjust GUI position for Bedrock (offset from Java position) |
/zpack bedrock item <name> … | Fine-tune 3D item position/scale/rotation per slot on Bedrock |
/zpack bedrock furniturescale … | Set furniture size globally or per piece on Bedrock |
/zpack fonts | List every registered glyph — shows pack, ID, Unicode codepoint, and the <font_image:pack:id> tag to use in gui.yml |
/zpack font <pack> <id> | Preview a glyph in your action bar so you can check its size and position (player only) |
/zpack glyph list [pack] | List all glyphs; add a pack name to filter |
/zpack glyph <pack> <id> | Detailed info about one glyph (codepoint, Unicode, YAML tag) |
/zpack glyph search <query> | Search glyphs by name — useful when you have dozens of font images |
/zpack glyph export | Print YAML snippets for all glyphs (use to lock codepoints so they don't shift) |
/zpack glyph regenerate | Clear the glyph registry and reassign all codepoints from scratch |
/zpack gui [pack] | Debug GUI configuration for a pack |
/zpack rank [pack] | Debug rank / glyph permission configuration |
/zpack block <pack> <key> | Show block registration info |
/zpack item <pack> <key> | Show item registration info (CMD, material, texture path) |
/zpack armor <pack> <key> | Show armor registration info |
Permissions
All permission nodes and their defaults.
| Permission Node | Default | Description |
|---|---|---|
cxp.reload | OP only | Run /z reload to reload all configs and rebuild the pack |
cxp.use | Everyone | Basic /z command access |
cxp.give | OP only | Give items to other players via /z give |
cxp.gui | Everyone | Open /z gui (main category browser) |
cxp.items | Everyone | Open /zitems (pack item browser) |
cxp.repair | Everyone | Use /zrepair to repair custom items |
cxp.mastery | Everyone | View mastery progress with /zmastery |
cxp.missions | Everyone | View mission board with /zmissions |
cxp.prestige | Everyone | Access prestige with /zprestige |
cxp.reforge | Everyone | Open reforge GUI with /zreforge |
cxp.socket | Everyone | View gem socket info with /zsocket info |
cxp.socket.add | OP only | Add/remove sockets from items |
cxp.craft | Everyone | Use custom crafting tables |
cxp.craft.admin | OP only | Manage crafting recipes |
cxp.admin | OP only | Admin commands (/z info, /zpack, /zworld) |
customizer.crops.admin | OP only | Crop admin commands |
customizer.crops.give | OP only | Give crop seeds via /zcrop give |
customizer.craftingtable.<name> | OP only | Access a specific crafting table (when permission.required: true) |
gem_ranks.<rank_key> | Assigned by admin | Shows the rank glyph for that rank key (e.g. gem_ranks.bronze_amethyst_i) |
VIP, MVP, ELITE and the repair cooldown/discount system will pick up the group name automatically.